Resize Partition
Resize Partition feature can be used to change existing partition size without losing data or reinstalling Operating System.
Why resizing partitions?
Most of the new laptop, PC and server are pre-installed with a small system C: drive and some other data partitions. Even if you create a large system partition by yourself, when the computer has been used for a long time, you may encounter the problem: the system drive is running out of space. Originally, you have to back up everything, delete and recreate the disk partitions and then restore everything back. It costs such a long time to do this and some files may lost during these operations.
With the Resize Partition feature of the partition magic software, you can solve this problem fast and easily. Resizing partition means to change the size of the existing partitions directly. As long as there is free unused space in any partitions, you can extend other drives by taking free space from them. Operating System, applications and all files keep the same after resizing.
Before you do
- Check the partitions you want to resize and make sure there is no error.
- Do not forcibly terminate the tasks or turn off the power during resizing, otherwise, it may cause data loss.
- Close all running applications before starting the program to resize.
How to resize disk partitions?
To extend a drive, there should be contiguous free Unallocated space, however, in most cases there is no such free space, so you need to resize the partitions with our program. To explain clearly how to do this, we have to divide the disk partition layout into several scenarios. It’ll save much time if you can open your Disk Management console and find out your own disk partition layout.
- Case1: There is contiguous Unallocated space behind the partition you want to extend.
- Case2: There is no contiguous Unallocated space and you have to shrink other drives to get it.
- Case3: There is no free space in all partitions in the same hard disk to extend a drive.
Case1: There is contiguous Unallocated space
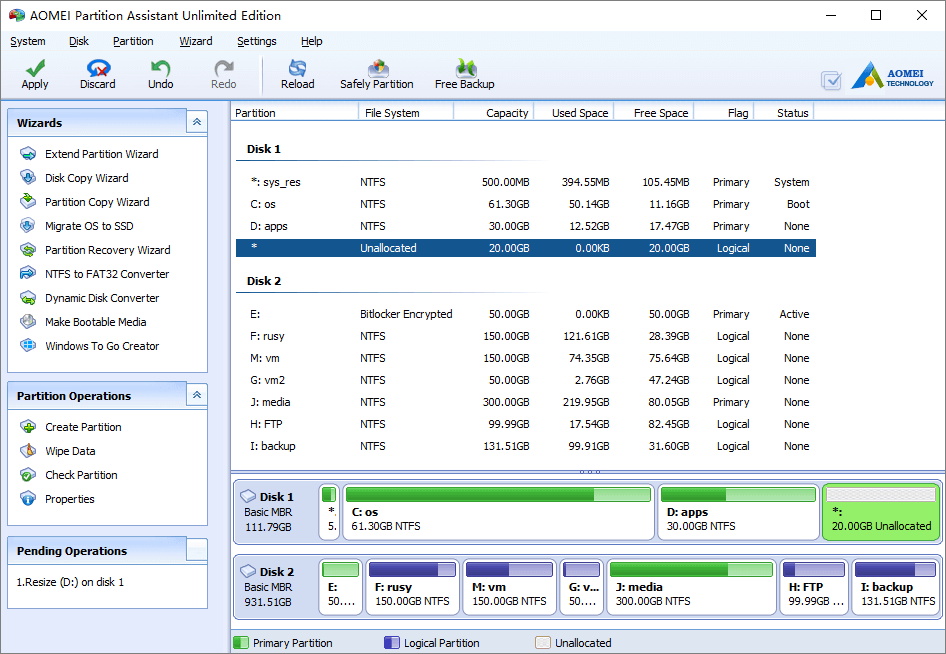
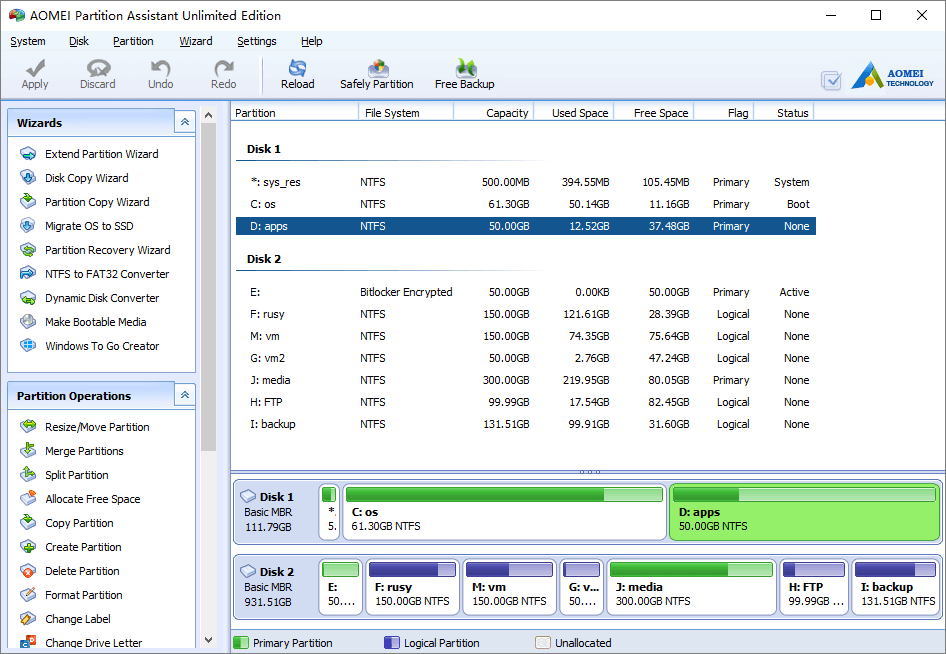
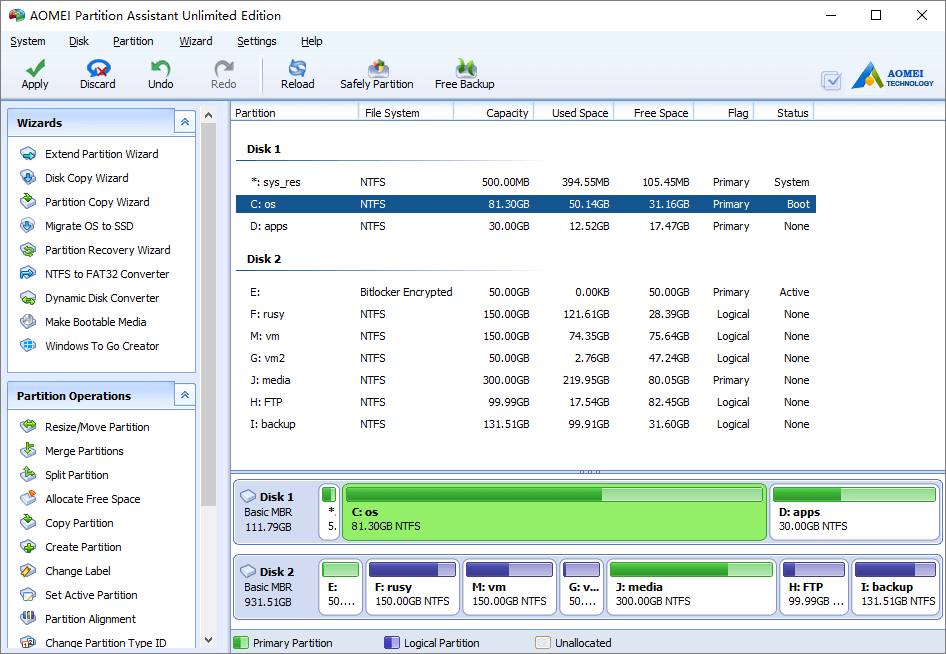
Launch the program and you’ll see all connected disk partitions. There is 20GB free Unallocated space adjacent to drive D:, so it is very easy to extend D.
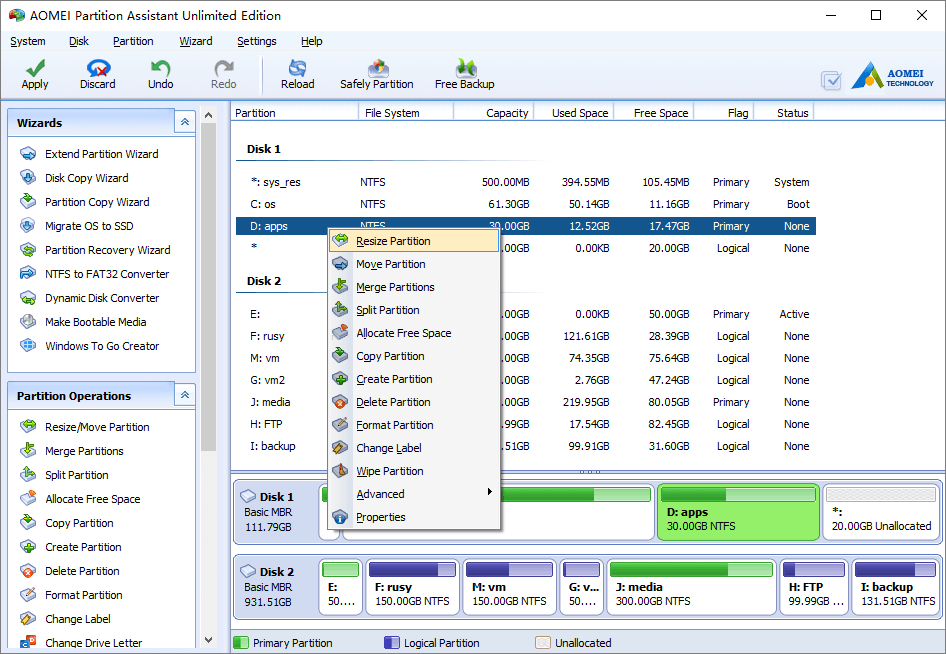
Right click drive D: and select “Resize Partition” feature.
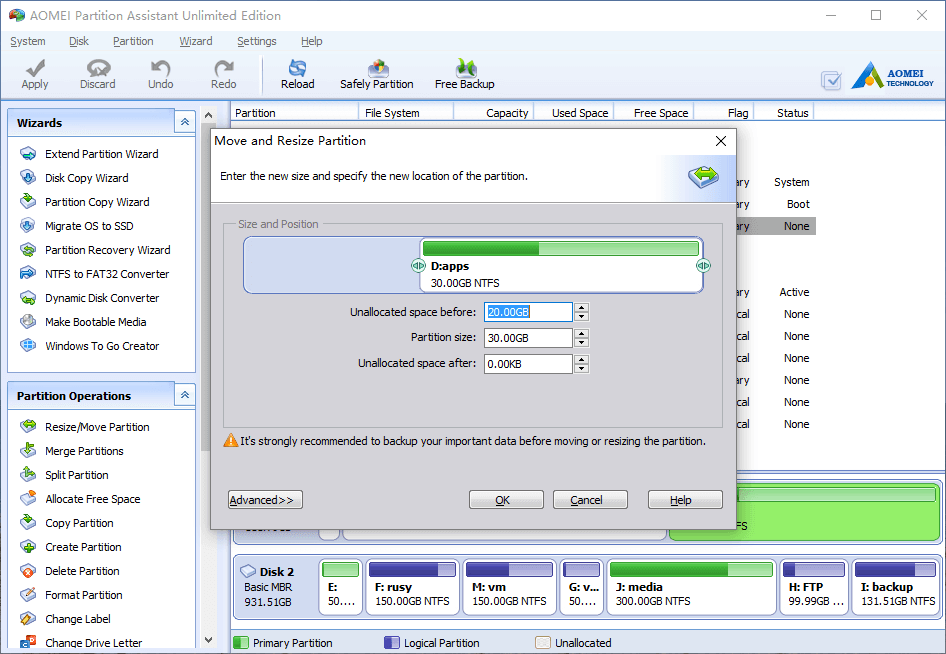
In the pop-up window, you’ll see that the 20GB free space is behind drive D.
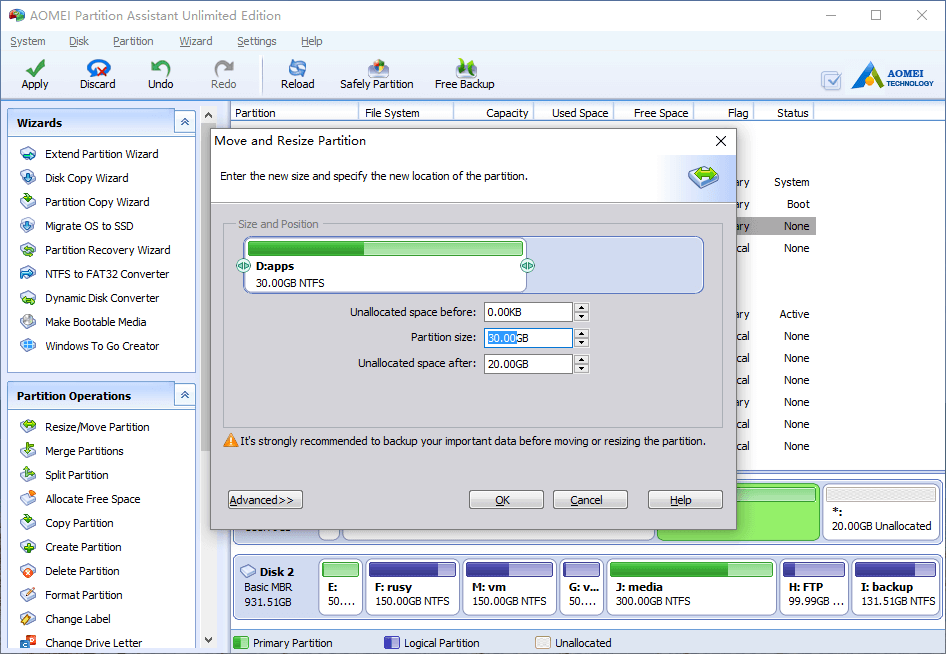
Drag the right border of D rightwards to hold the free Unallocated space.
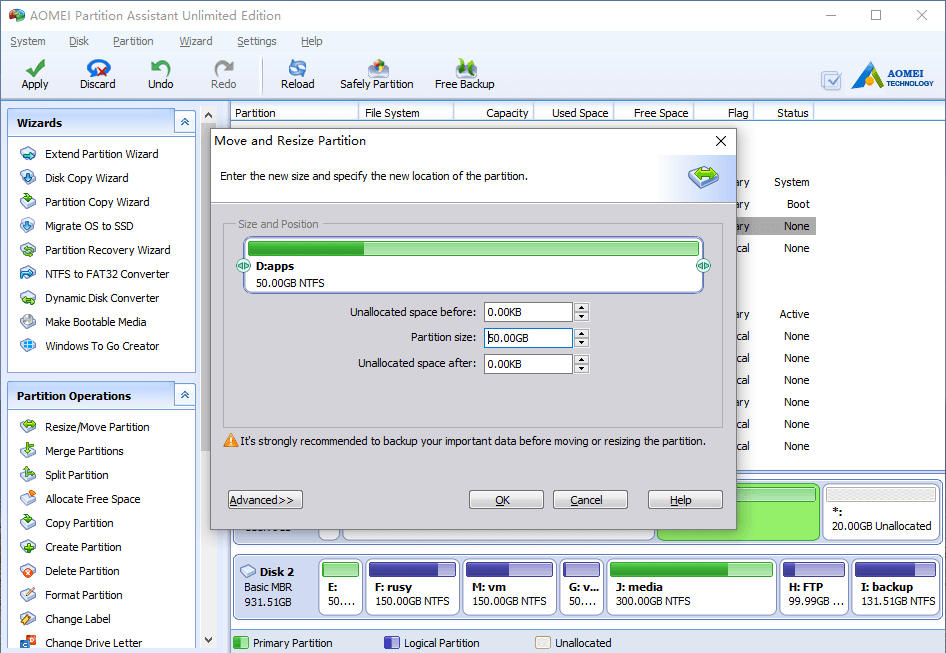
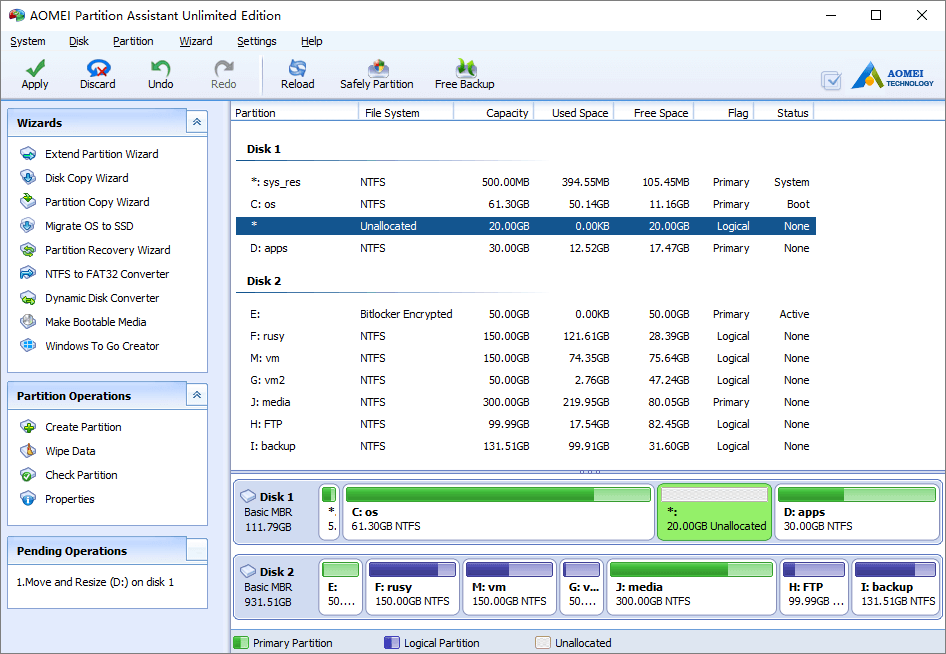
Click OK and back to the main window, you’ll find that the 20GB Unallocated space has been added to drive D.
Press “Apply” button on top left to proceed. (All operations before clicking “Apply” work in virtual mode of the program, only when you click “Apply”, the physical disk partition will be changed.)
Case2: There is no contiguous Unallocated space
From the screenshot above, there is no free Unallocated space in Disk 1, but you can extend drive C: by shrinking D.
Right click partition D and select “Resize Partition”, in the pop-up window, drag the left border rightwards.

Click OK and back to the main window, the Unallocated space that shrank from D created behind drive C:
Right click drive C and select “Resize Partition” again. In the pop-up window, drag the right border rightwards to hold the Unallocated space.
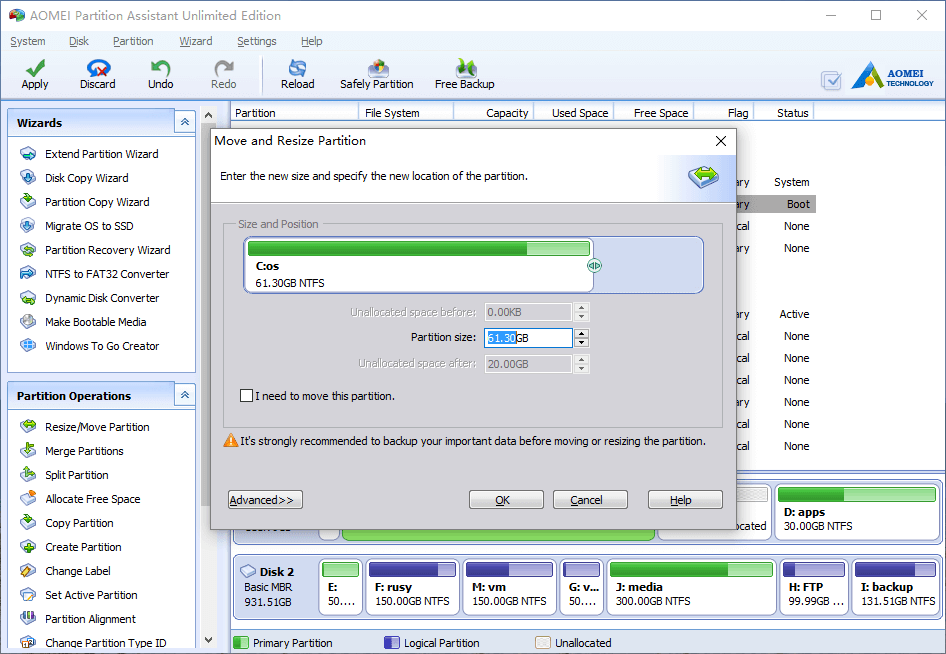

Click OK and back to the main window, the 20GB Unallocated space has been added to C drive.
Press “Apply” button on top left to proceed.
To make the partition resizing task becomes easier, our program provide unique feature “Allocate Free Space“, which is one-click solution. You can extend C (or other drive) by taking free space from any partitions no matter they are contiguous or not.
Case3: There is no free space in all partitions
If there is no free space in all data partitions, of course you cannot extend C by resizing them, but there is still one way to solve this problem. Our magic partitioning software provide Disk Copy feature, with which you can copy the disk to another larger one. You can resize the partitions and extend C drive in the larger disk.
Note:
The partition shrinking operation will be performed under PreOS Mode of our program and your computer will reboot to proceed when:
- Shrinking system and/or boot partition.
- Shrinking a partition on which the page file or the installation file of our program are stored.
- Shrinking a partition where other applications are running.
- How to reallocate free space
- How to resize partition
- How to move partition
- How to merge partition
- How to split partition
- How to convert Logical partition to Primary
- How to convert Primary partition to Logical
- How to convert between MBR and GPT
- How to change partition type ID
- How to change serial number
- How to rebuild MBR
- How to align partition