How to resize/extend Primary partition in Windows without data loss?
In MBR style disk, both Primary and Logical drives can be resized. About partition resizing, there is difference. You can extend either Primary or Logical drive by shrinking other drives in the same hard disk. Here I’ll show you how to resize Primary partition in Windows 10/8/7/Vista/XP and Server 2016/2012/2008/2003 R2, step by step to extend primary partition without losing data.
What is Primary partition
A Primary partition is the drive Operating System can be installed in. An MBR hard disk may contain a maximum of 4 primary partitions. In GPT disk, the primary partition can be up to 128. An Active partition is based on primary partition. Any one of the 4 primary partitions can be set as Active partition. Since there can be 4 primary partitions with 4 different Operating Systems installed, one of the partition that is marked active is used for the initial booting. The active partition contains the boot loader (such as ntldr or bootmgr) to load operating systems from a disk.
Benefit to resize Primary partition
Primary partition can be system boot drive or a regular data drive. The most common issue in a system primary partition is lack of free space. In this situation, you can resize partitions to extend this drive. By this way, you can fix this issue fast and easily.
However, you’d better select a reliable program to complete this task, a bad program may cause partition corruption or data loss. To ensure 100% data/system safety, you’d better make a backup with Windows built-in or 3rd-party utility.
How to extend Primary partition
The Primary or Logical partition to shrink and extend should be in the same hard disk, no partitioning software can resize partitions beyond 2 physical disks.
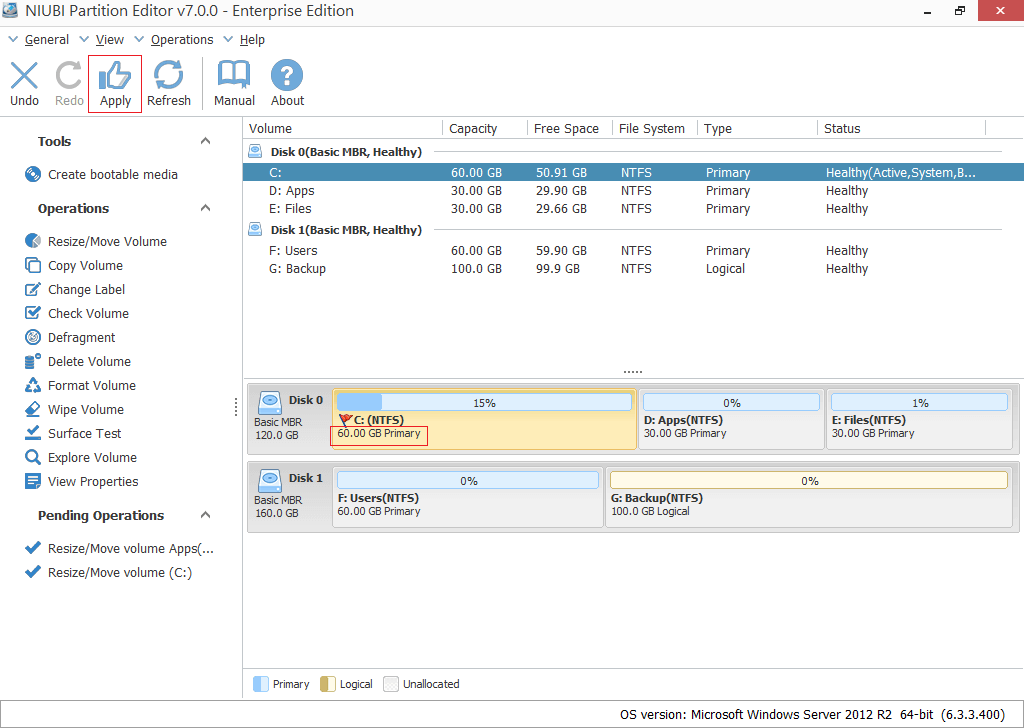
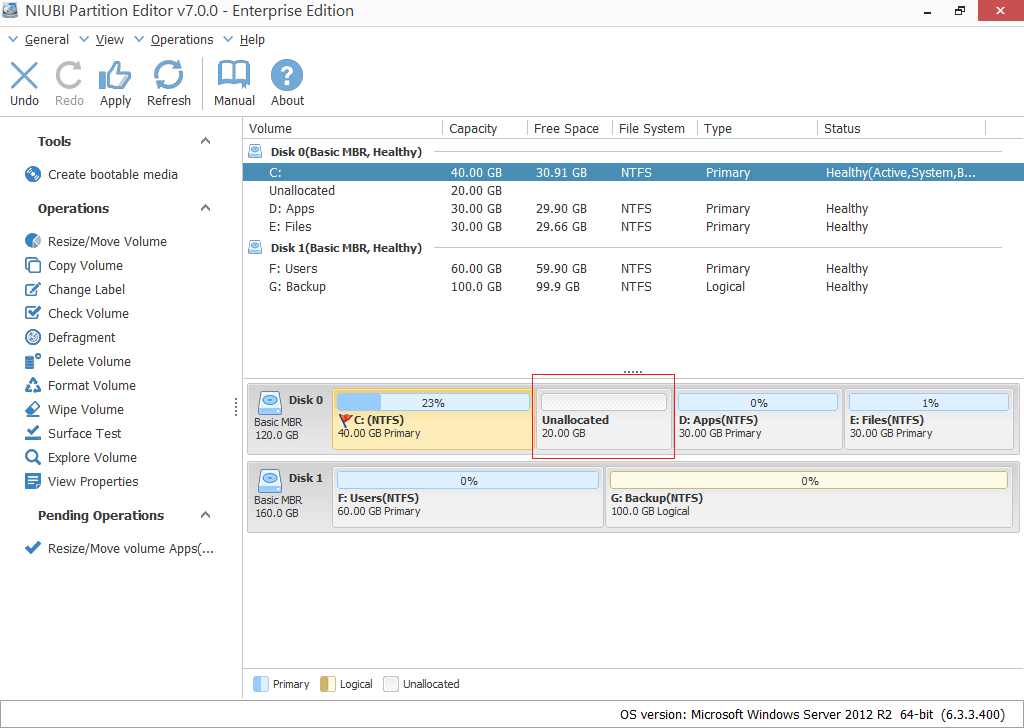
Step 1: Download NIUBI Partition Editor, right click D: drive and select “Resize/Move Volume“.
Step 2: In the pop-up window, drag the left border rightwards to generate free Unallocated space.

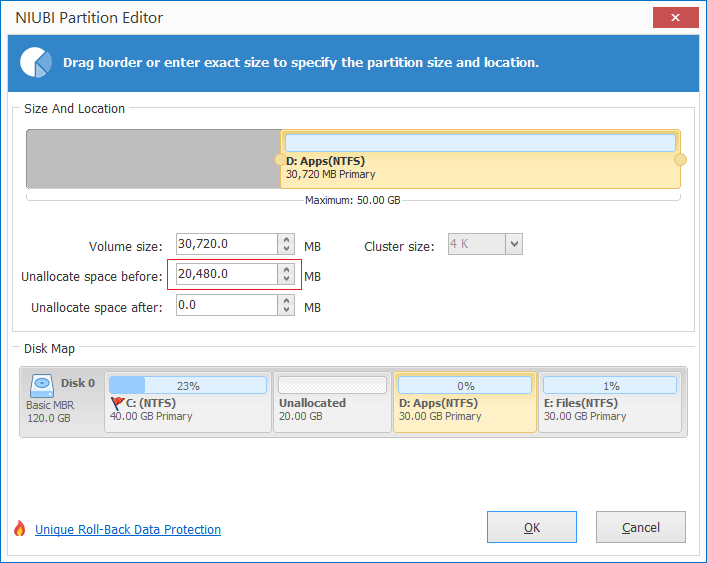
Click OK and back to the main window, where 20GB Unallocated space created behind C: drive.
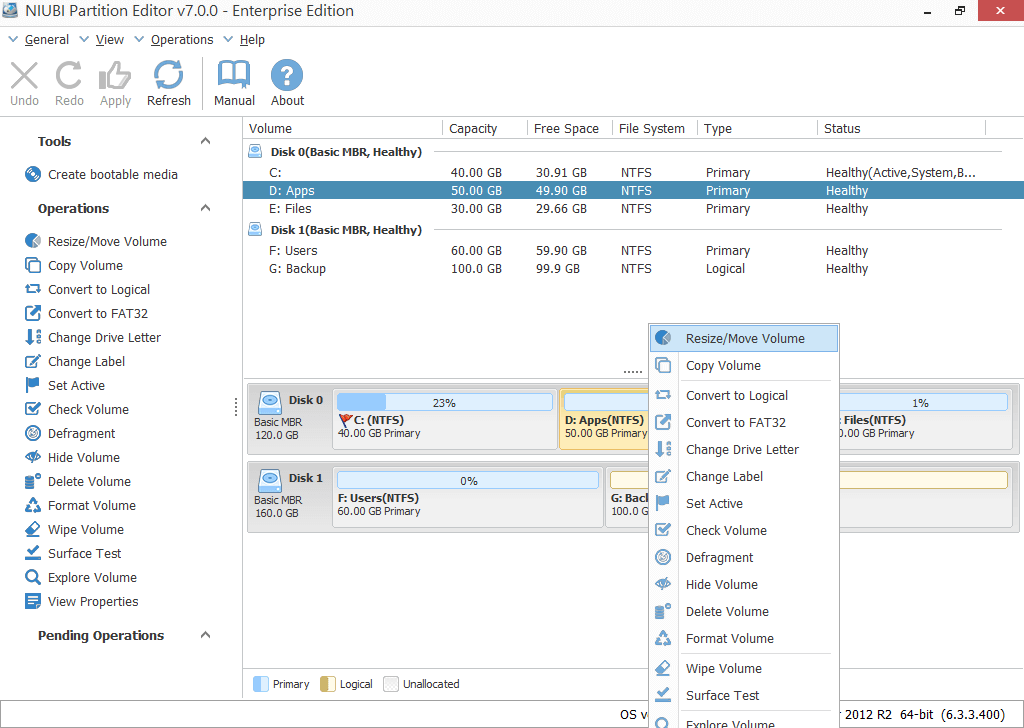
Step 3: Right click C drive and select “Resize/Move Volume” again, in the pop-up window, drag the right border rightwards to hold the Unallocated space.

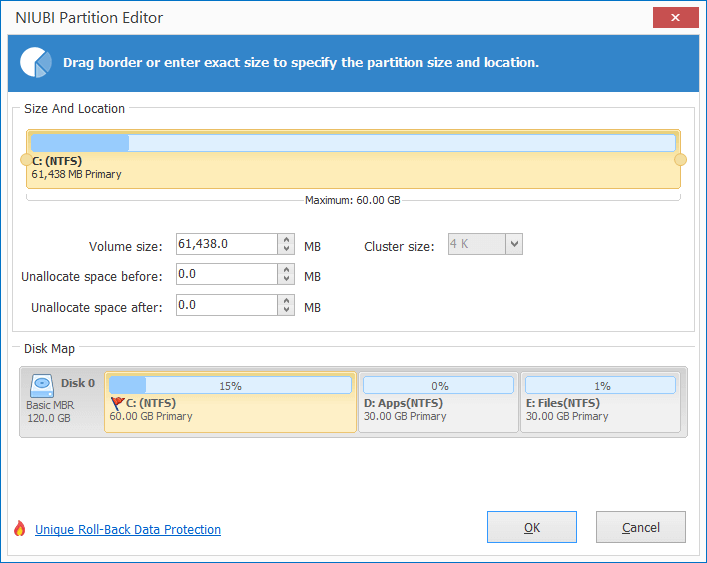
Click OK and back to the main window, where C drive extended to 60GB by holding the 20GB free space from D. Press Apply on top left to execute, done!