How to fix and disable Low Disk Space alert?
When a drive especially the system C drive becomes full or is running out of free space, you are very likely to see the “Low Disk Space” warning/alert. Microsoft create the low disk space alert for your attention to take some actions to fix this issue or it will keep popping out frequently. It is headache for many computer users, so here I want to share my experience how to disable/remove the Low Disk Space message and solve this problem completely. It is valid for Windows 10/8/7/Vista/XP and Server 2016/2012/2008/2003 (R2)
Overview:
Low Disk Space Error Symptoms
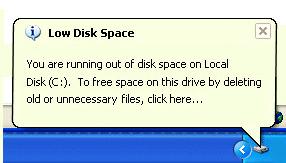
When system C drive becomes full, it displays the low disk space warning at bottom right corner – “You are running out of disk space on Local Disk (C:). To free space on this drive by deleting old or unnecessary files, click here.”
In Windows XP and Server 2003:
In Windows Server 2008:
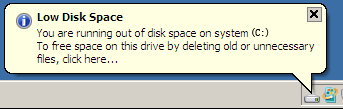
In Windows Vista and later editions:
C drive changes to be red instead of default blue bar in “My Computer” when it is running low on disk space .

Whenever you see the Low Disk Space warning, try to solve this problem as fast as possible, because it causes many problem.
More about Low Disk Space alert
From Microsoft’s explanation, users will receive Low Disk Space Warning in following situations:
- When free space reaches 200MB
Users receive the warning message for 10 seconds, once per session. In this situation, system automatically takes actions to maintain minimum performance capabilities. - When free space reaches 80MB
Users receive the warning message for 30 seconds, every four hours, twice per session. In this situation, Windows starts to free up drive space by deleting previous System Restore points. - When free space reaches 50MB
Users receive the alert message for 30 seconds, every five minutes, until the free space is above 50 MB. In this situation, Windows will purge the all System Restore points, and suspend the System Restore function. System Restore will not be reactivated until 200MB free space available in the system partition.
Risk of Low Disk Space
If C drive is low on disk space, it will cause many problems, such as:
- Hard disk drive is not big enough to accommodate all your needs, such as software update/upgrade, install programs.
- Windows operating system is running extremely slowly.
- Windows may crash if the space is extremely low.
So you need to fix low disk space problem as soon as possible.
How to fix Low Disk Space issue
When this low disk space warning pop up, click this message icon and follow the steps to run the Disk Cleanup function. This tool will scan your drives and look for files that you can safely delete. By freeing up space, you can disable the low disk space warning temporarily, but this warning may pop up in the future, because system update and files, applications and other files eat up the free space of C drive continuously.
To completely solve the Low Disk Space problem, you should expand C drive to larger size.
1. Free up disk space
Besides Windows built-in Cleanup utility, you may use 3rd party software, or do it by yourself:
Option 1: Delete Temp files
Click Start > Run, input “%temp%” or open directory step by step “C:\Users\Administrator\AppData\Local\Temp”
Option 2: Delete old Shadow Copies
Open “My Computer“, right-click C drive, select Properties, switch to “Shadow Copies” tab, delete old volume copies.
Option 3: Empty Recycle Bin and decrease the disk usage size
Empty Recycle Bin by right clicking it, but before this, you’d better open it to check whether these files can be deleted permanently.
Option 4: Decrease the Recycle Bin disk usage size:
Right-click Recycle Bin > Properties, you can easily custom the size.
- How to free up space in Windows Server 2003/XP
- How to free up disk space in Windows Server 2008
- How to free up space in Windows Server 2012
2. Expand C drive
As I said above, to complete solve the low disk space problem, the best choice is extending C drive by taking free unused space from other data drives. NIUBI Partition Editor helps you resize and expand volume without losing data, everything keeps the same after re-partitioning.
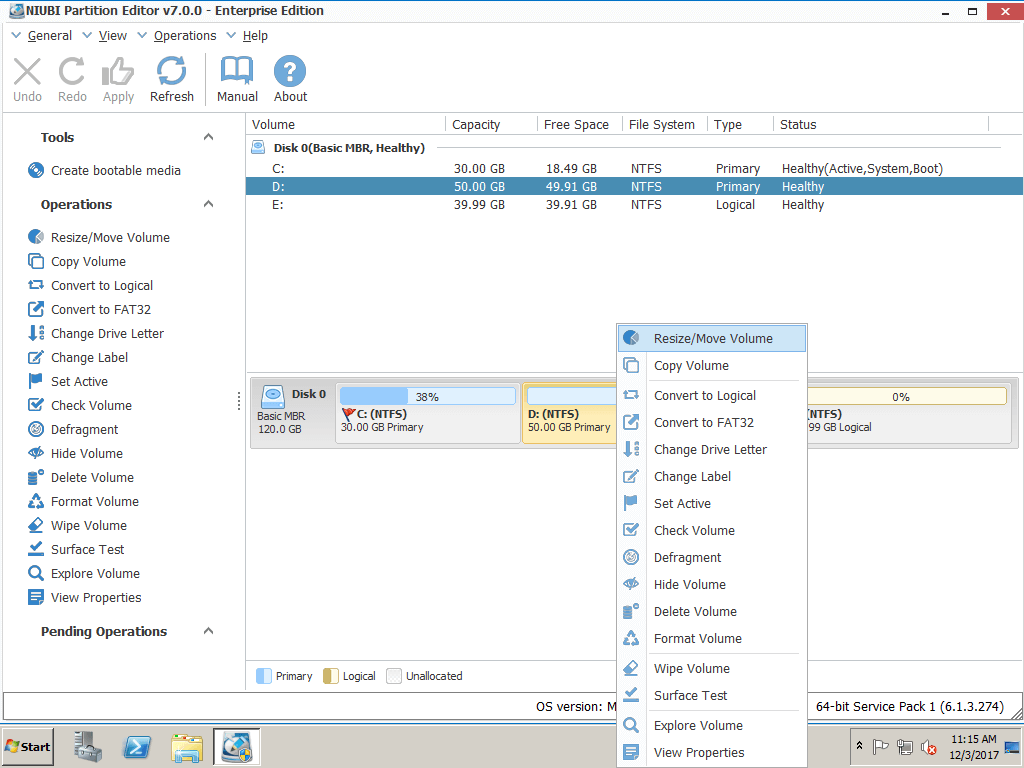
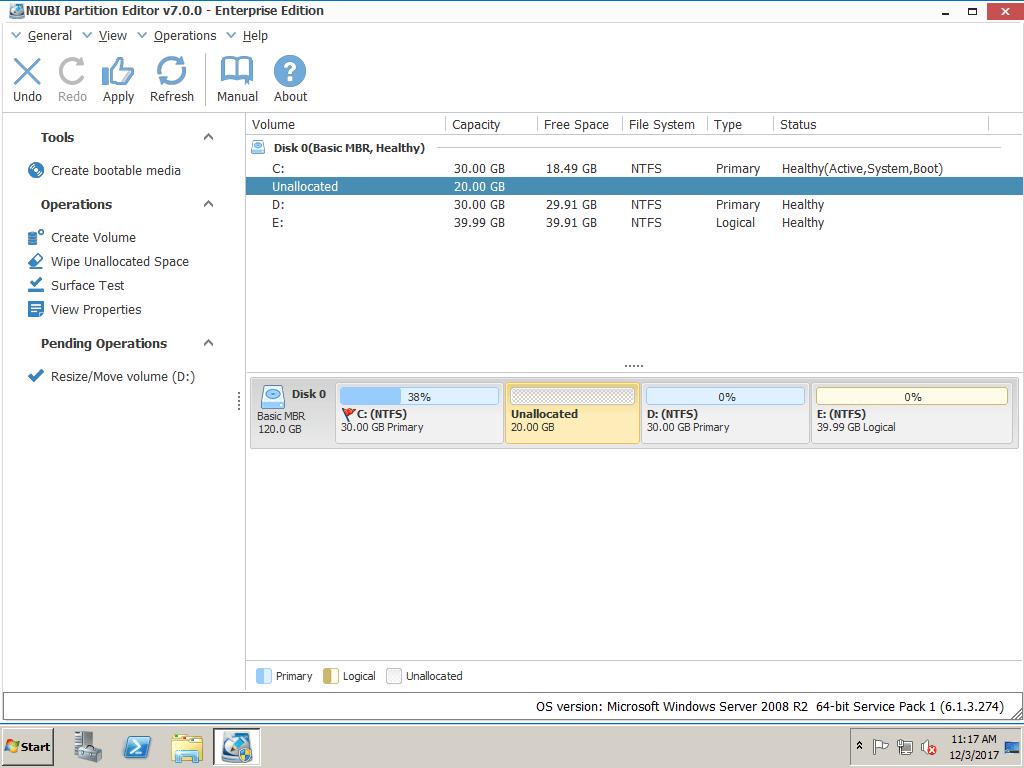
Step 1: Download and install NIUBI Partition Editor, right click drive D: and click “Resize/Move Volume“.
Step 2: In the pop-up window, drag the left border rightwards to generate free Unallocated space.

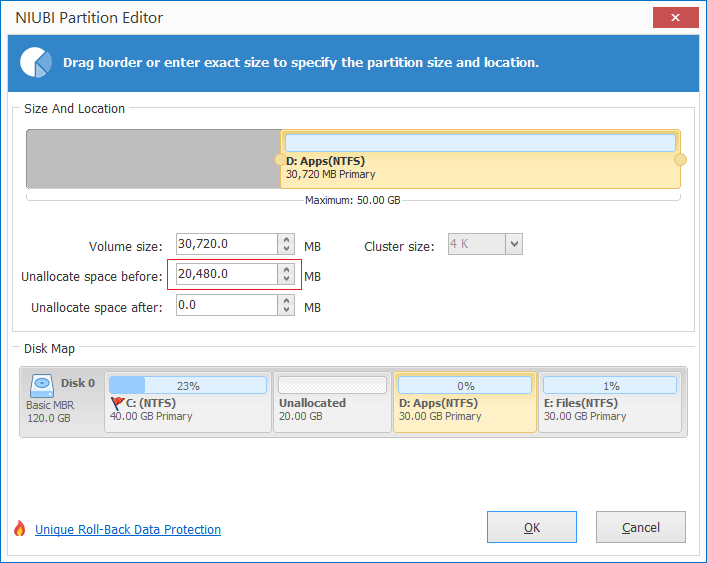
Click OK and back to the main window, where 20GB Unallocated space created behind C: drive.
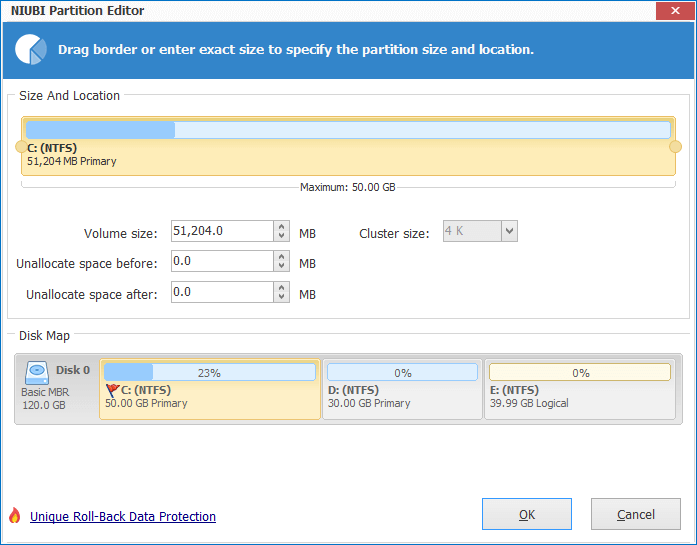
Step 3: Right click C drive and select “Resize/Move Volume” again, in the pop-up window, drag the right border rightwards to hold the Unallocated space.

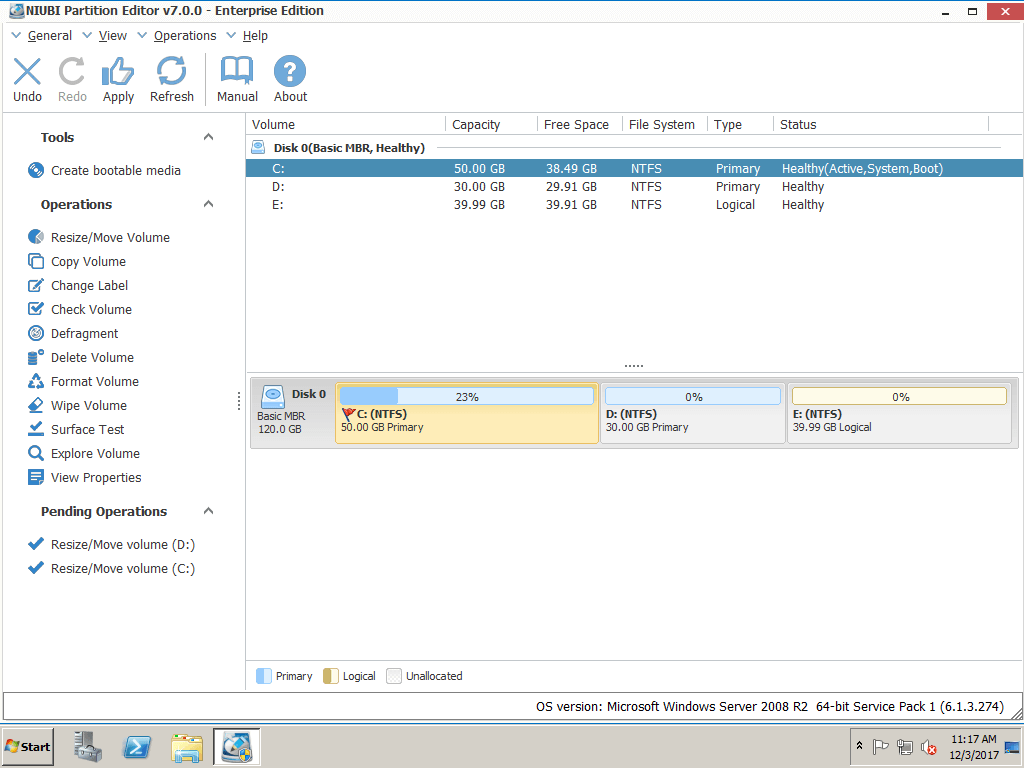
Click OK and back to the main window, where C drive extended to 50GB by holding the 20GB free space from D. Press Apply on top left to execute, done!
Video guide to add free space to C drive