How to resize C drive in Windows Server 2008 (R2)?
It is the most common problem in Windows Server 2008 that C drive is running low of free disk space, especially for the OEM servers. Most of the OEM servers create a small system C drive and a larger data drive. In daily usage, Windows update, applications, cache, system service and many other types of data goes into C drive continuously, so the free space becomes lower and lower. To solve this problem, firstly try to free up some space with Windows built-in Cleanup utility, and then resize the C drive in Windows Disk Management or with 3rd party software.
Resize partition with Server 2008 Disk Management
Better than the previous Windows Server edition, Server 2008 enhanced the ability of Disk Management, where you can resize disk partitions with the built-in feature Extend Volume and Shrink Volume.
– Shrink C drive
If C drive is created too large, you can shrink it to release free unused space.
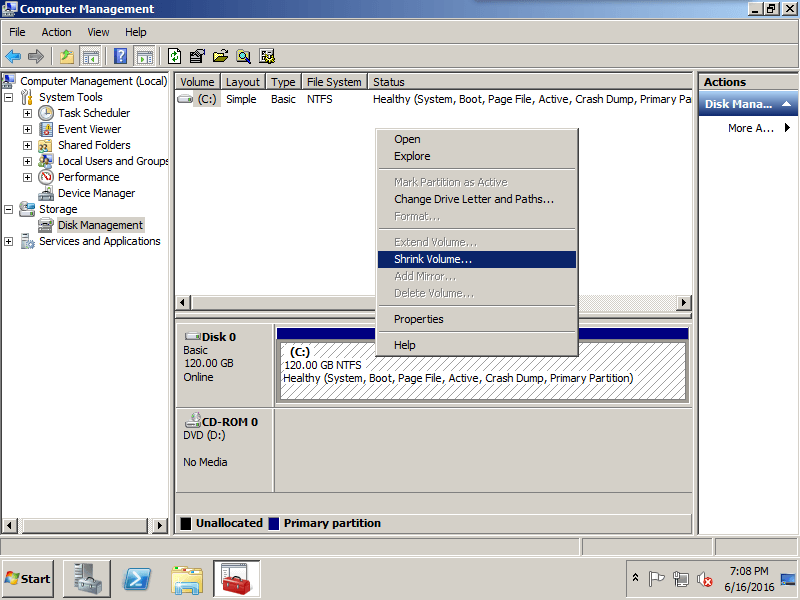
Step 1: Press “Windows” and “R” on keyboard, type “compmgmt.msc” to open Disk Management console. Right click C drive and select “Shrink Volume“.
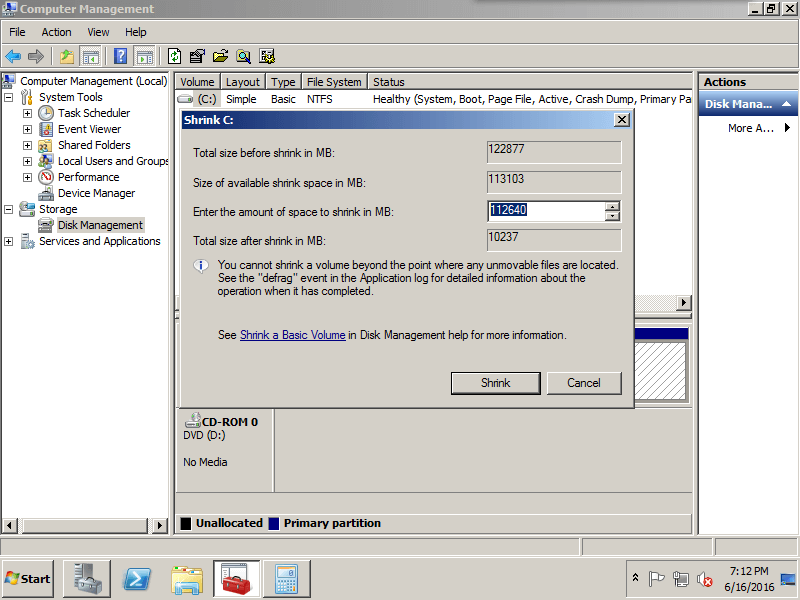
Step 2: In the pop-up window, type the value how much free space to shrink from the C drive.
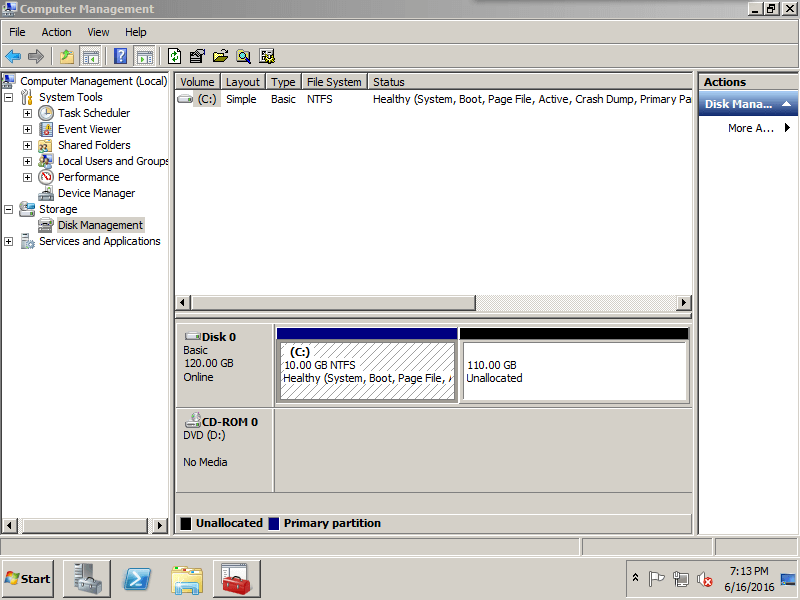
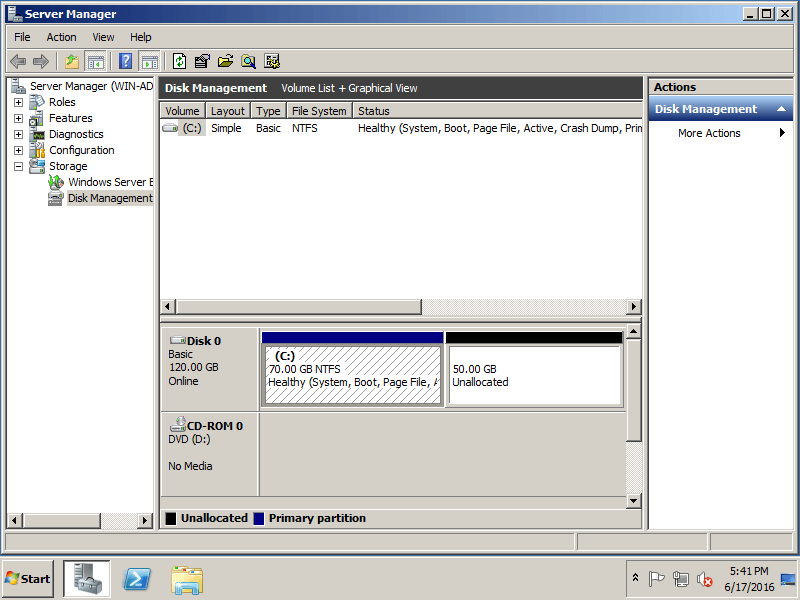
Step 3: Click “Shrink” and the operation complete in a short time. Original 120GB C drive becomes 10GB and the unused space becomes Unallocated.
Note: 1. When you shrink a partition, unmovable files (for example, the paging file or the shadow copy storage area) are not automatically relocated and you cannot decrease the allocated space beyond the point where the unmovable files are located. In this case, you can only shrink a little space.
2. The Unallocated space can only be used to create new disk partitions, it cannot be used to extend another data drive.
– Extend C drive
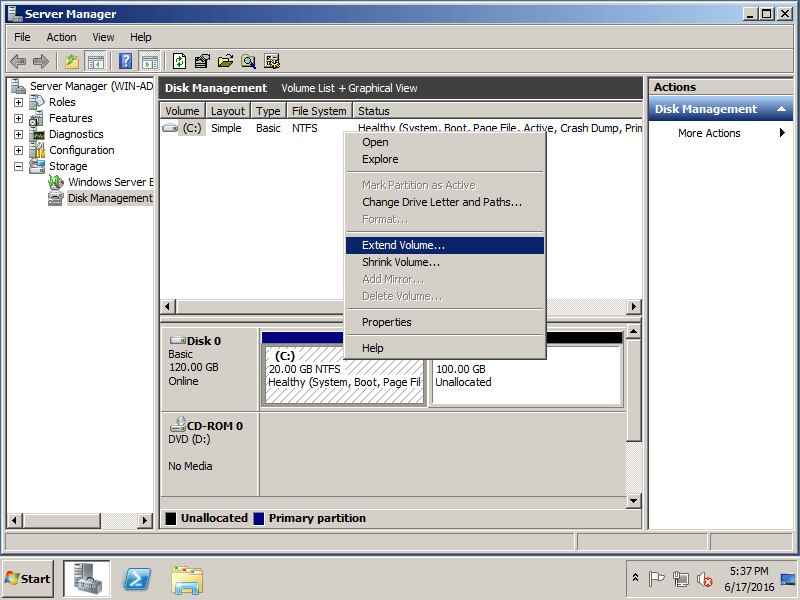
Step 1: Open Disk Management, right-click C drive and select “Extend Volume…”
 Step 2: In the pop-up window, type the value how much space to add to C drive and click Next.

Step 3: Confirm the operation and click “Finish” to proceed.
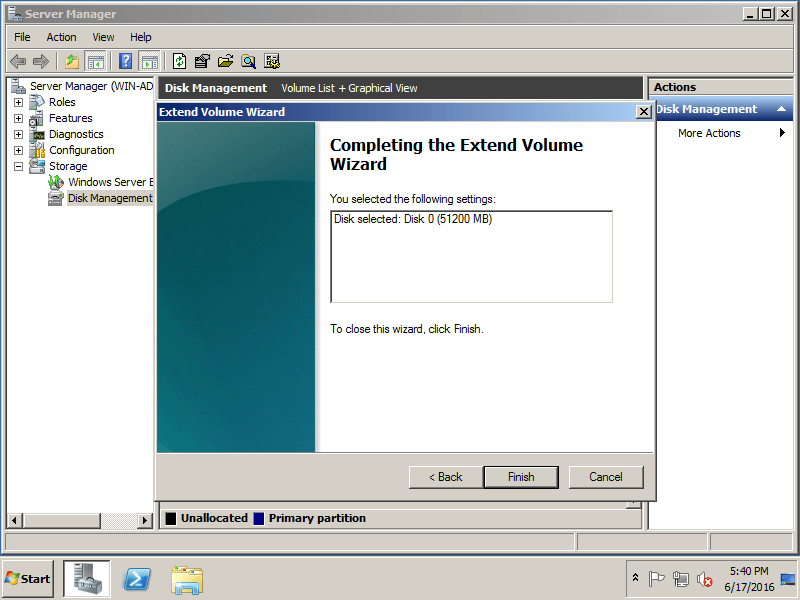
The extending operation complete in a short time.
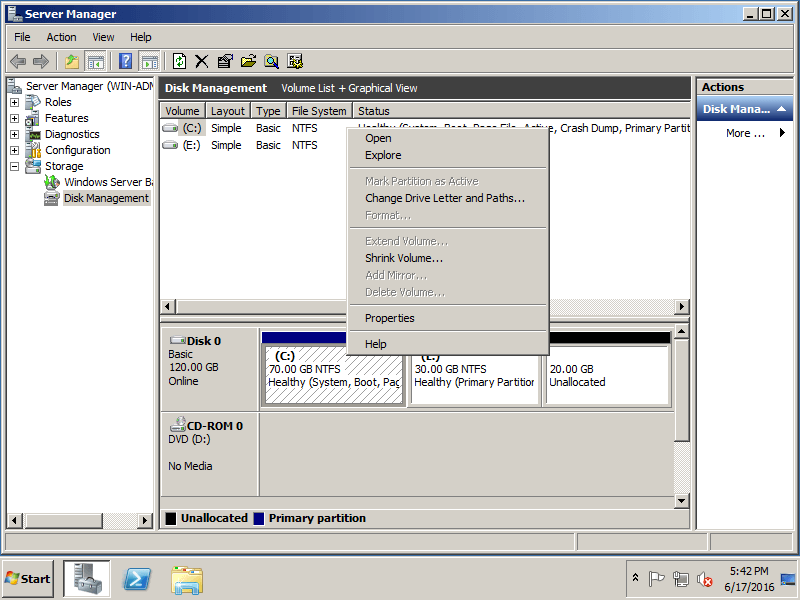
From the screenshot, when you right click C drive the “Extend Volume” is grayed out. The 20GB Unallocated space can only be used to extend drive E.
Resize C drive with 3rd party software
There are no such limitations when resizing C drive with 3rd party software.
Step 1: Download and install NIUBI Partition Editor, right click drive D: and click “Resize/Move Volume“.
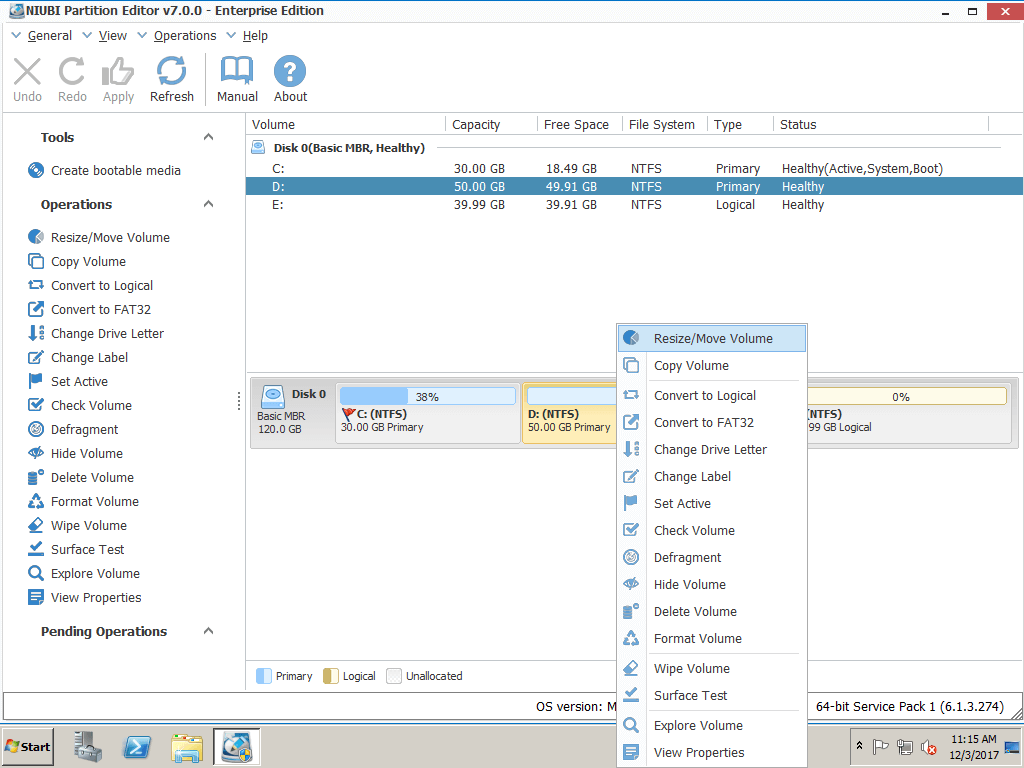
Step 2: In the pop-up window, drag the left border rightwards to generate free Unallocated space.

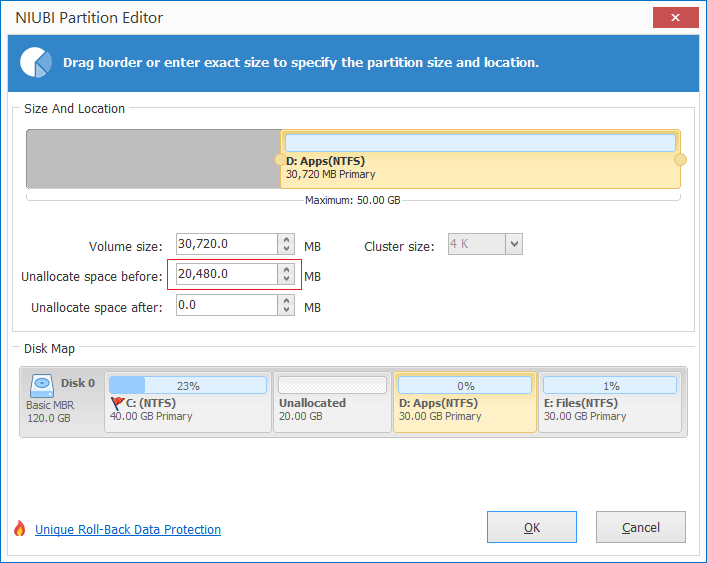
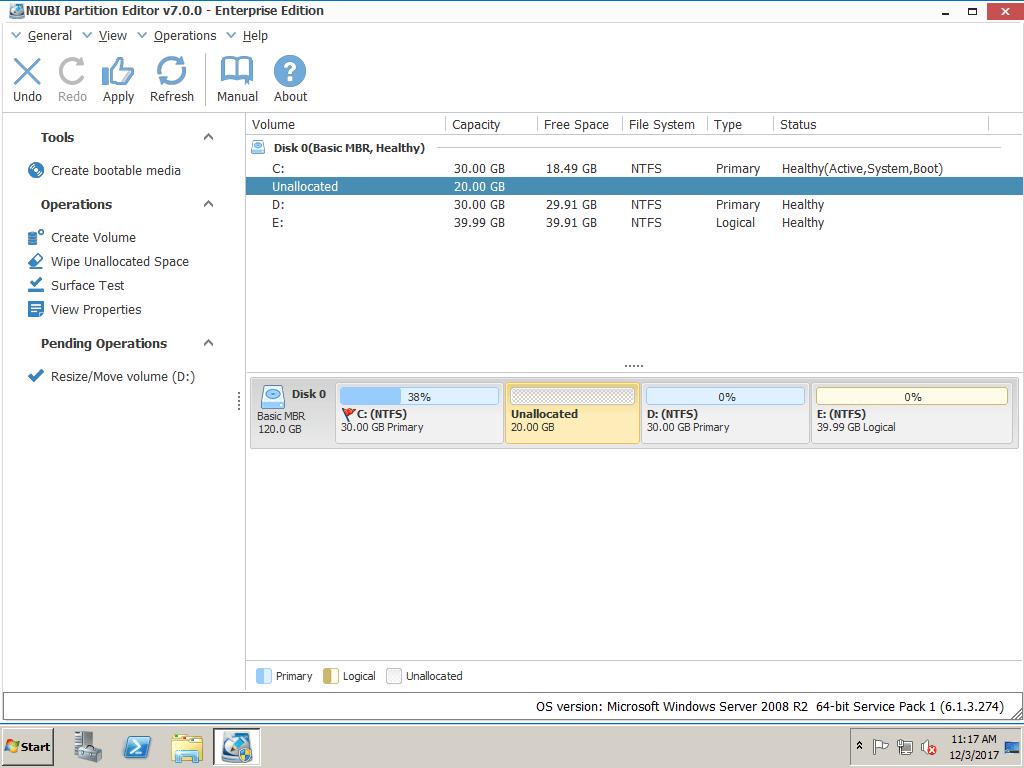
Click OK and back to the main window, where 20GB Unallocated space created behind C: drive.
Step 3: Right click C drive and select “Resize/Move Volume” again, in the pop-up window, drag the right border rightwards to hold the Unallocated space.

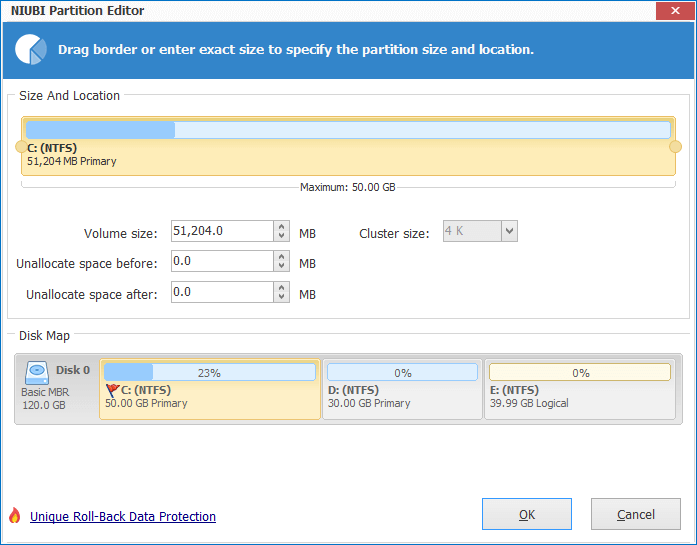
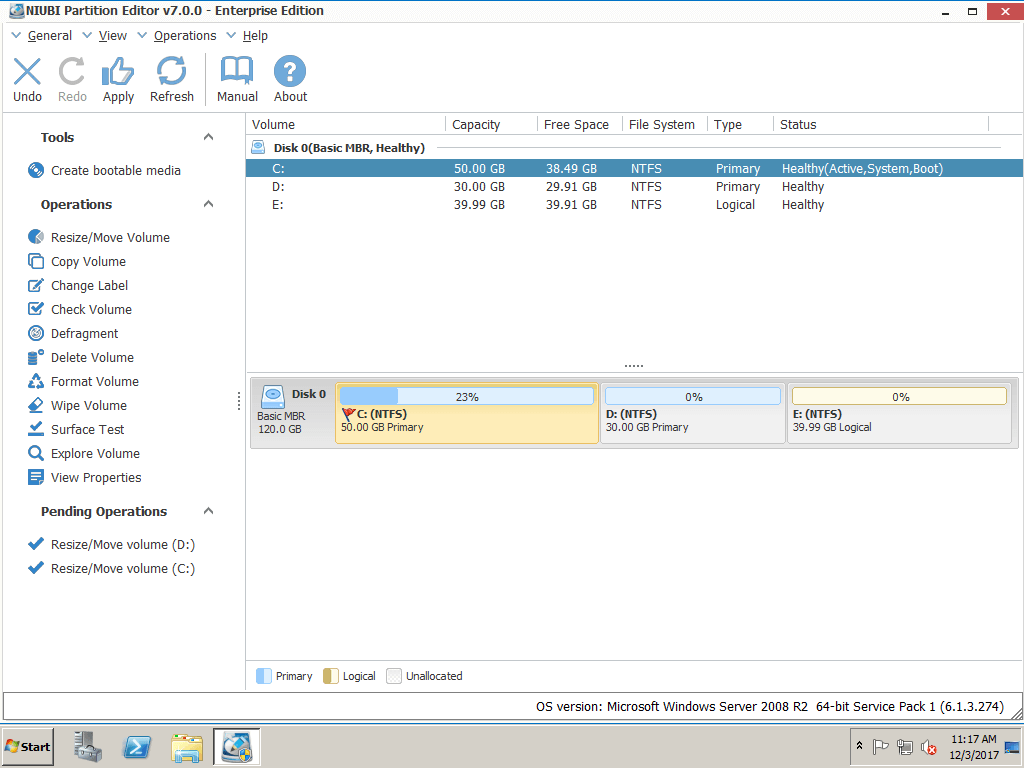
Click OK and back to the main window, where C drive resized to 50GB by holding the 20GB free space from D. Press Apply on top left to execute, done!
Video guide to resize system C drive in Windows Server 2008 R2:
How to extend C drive by shrinking other volume:

How to shrink C drive to expand other volumes:
In summary, Windows Server 2008 Disk Management has the ability to resize existing partitions, but it is very limited. To resize C drive on Windows Server 2008 (R2), NIUBI Partition Editor is better choice. The built-in Roll-Back Protection technology is able to automatically reverts server to original status in a flash if any error occur while resizing partitions. It is 30% – 300% faster than other tools because of its unique file-moving algorithm.