Disk Cleanup in Windows Server 2012 R2
Overview:
What is Disk Cleanup
Disk Cleanup (cleanmgr.exe) is a computer maintenance utility first introduced with Windows 98 and included in all subsequent releases of Windows. It is designed to free up disk space by removing files that are no longer needed or that can be safely deleted.
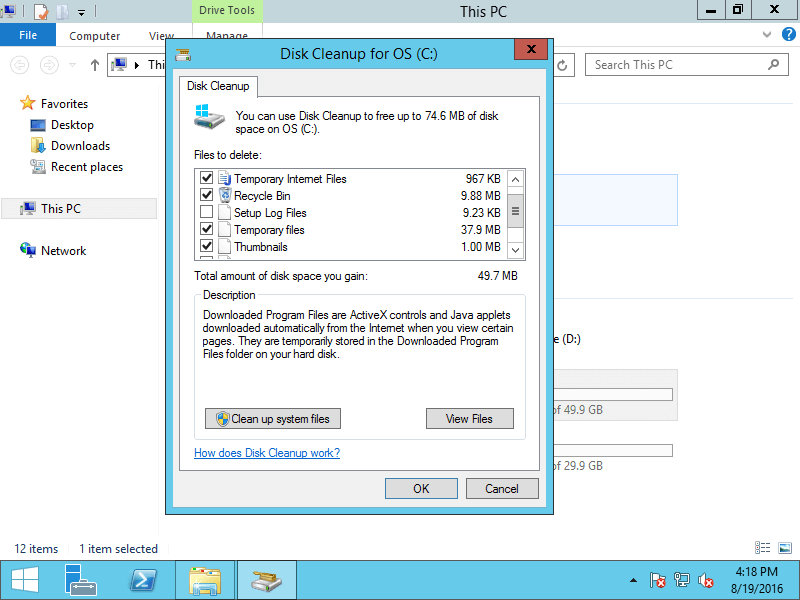
There are a number of different file categories that Disk Cleanup targets when performing the initial disk analysis:
- Compression of old files
- Temporary Internet files
- Temporary Windows files
- Downloaded program files
- Recycle Bin
- Removal of unused applications or optional Windows components
- Setup log files
- Offline web pages (cached)
The above list is not exhaustive.
Disk Cleanup is missing in Windows Server 2012
Windows Disk Cleanup is very useful utility and I’ve used it to free up disk space from Server 2003. It helps remove most of junk and unnecessary files safely and easily. Many people feedback that Disk Cleanup is missing in Server 2012 R2.
If you try to run Disk Cleanup in Server 2012 from Run with command, you’ll receive the error: Windows cannot find ‘cleanmgr’. Make sure you typed the name correctly, and then try again.
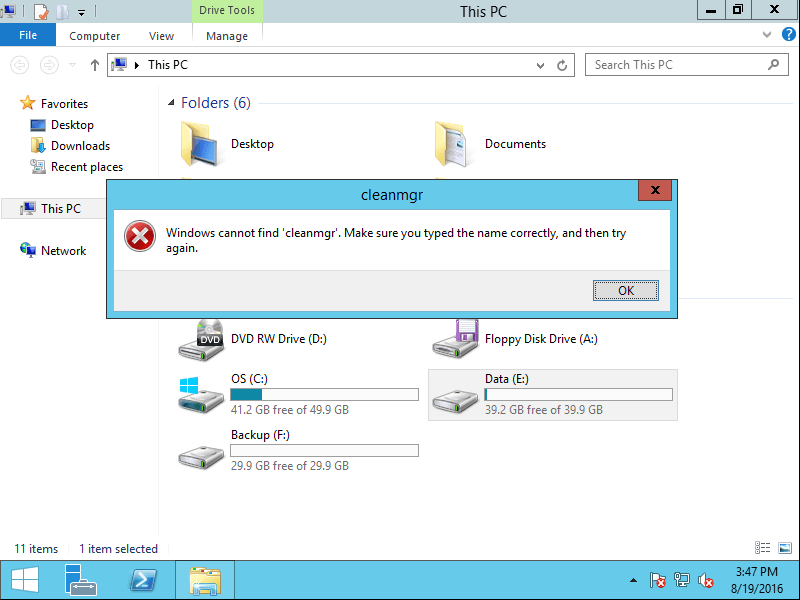
This is because that Disk Cleanup is not enabled in Server 2012 by default, before running it to free up disk space, you must enable or install this tool.
Enable Disk Cleanup in Windows Server 2012
There are two ways to enable Disk Cleanup in Windows Server 2012 (R2):
- Copy files from WinSxS
- Install Desktop Experience
The first option is easy and fast, but in some environment Disk Cleanup won’t work. The second option make sure Disk Cleanup work in all conditions, but it requires reboot to complete installing the Desktop Experience feature. Furthermore, together with Desktop Experience, many other unnecessary components are installed on the server, such as:
- Windows Media Player
- Desktop themes
- AVI support for Windows
- Windows SideShow
- Windows Defender
- Sync Center
- Audio recording
- Character Map
- Snipping Tool
1. Enable disk cleanup in Server 2012 without reboot
Note: This method is invalid for Server 2012 R2.
All you need to do is copying two files Cleanmgr.exe and Cleanmgr.exe.mui from WinSxS to system directory, steps:
1. Locate files:
- C:\Windows\WinSxS\amd64_microsoft-windows-cleanmgr_31bf3856ad364e35_6.2.9200.16384_none_c60dddc5e750072a\cleanmgr.exe
- C:\Windows\WinSxS\amd64_microsoft-windows-cleanmgr.resources_31bf3856ad364e35_6.2.9200.16384_en-us_b6a01752226afbb3\cleanmgr.exe.mui
2. Move files:
- Copy Cleanmgr.exe to %systemroot%\System32
- Copy Cleanmgr.exe.mui to %systemroot%\System32\en-US
You can now launch the Disk cleanup tool by running Cleanmgr.exe from the command prompt.
2. Install disk cleanup in Server 2012 (R2) with desktop experience
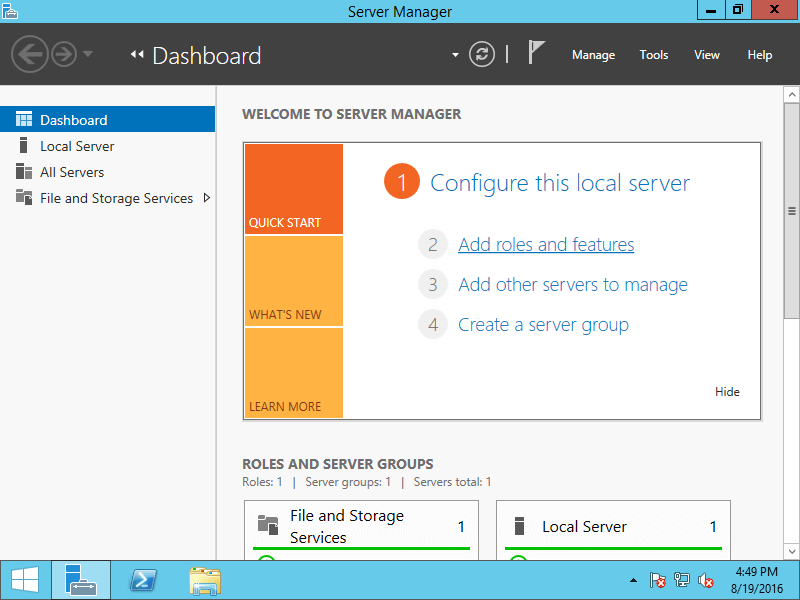
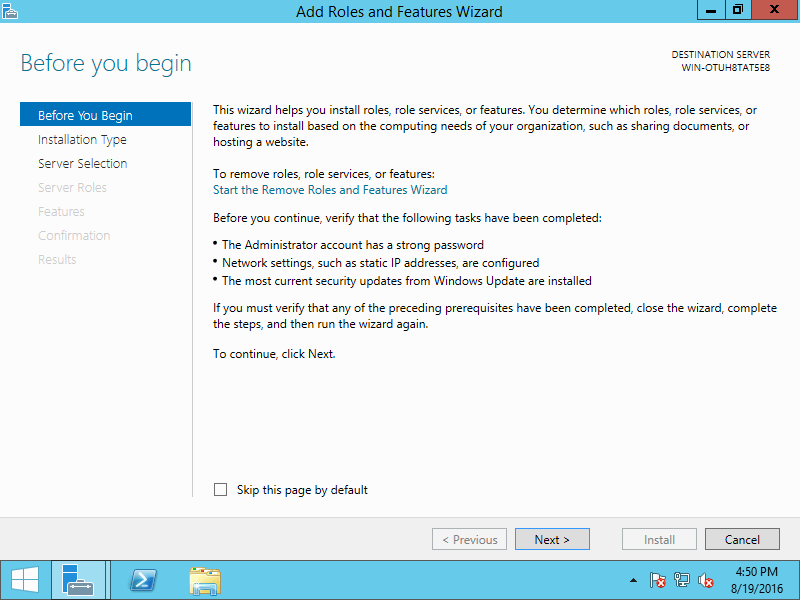
Step 1: Click Server Manager on bottom left, click the 2nd option “Add roles and features“.
Step 2: Click Next till you see the Features.
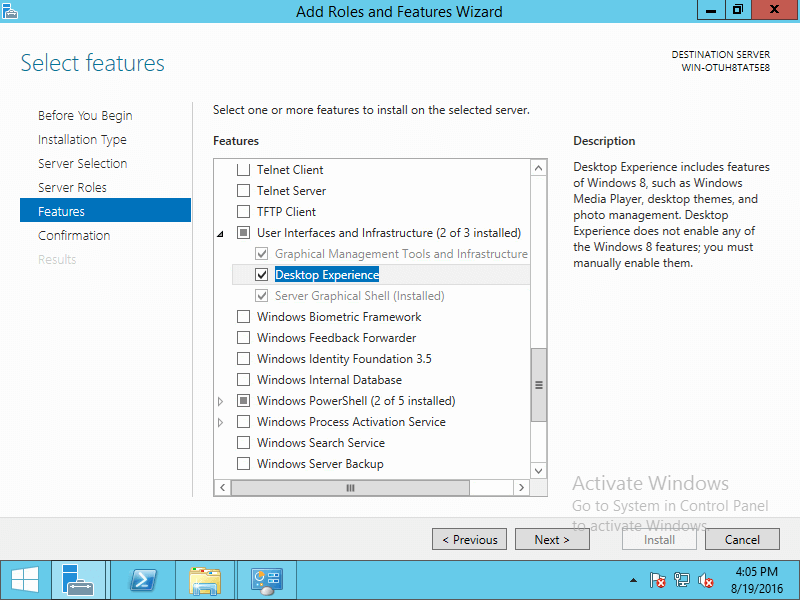
Step 3: Click the check-box in front of “Desktop Experience” and click Next.
Step 4: Within several minutes, the installation complete, click Close.
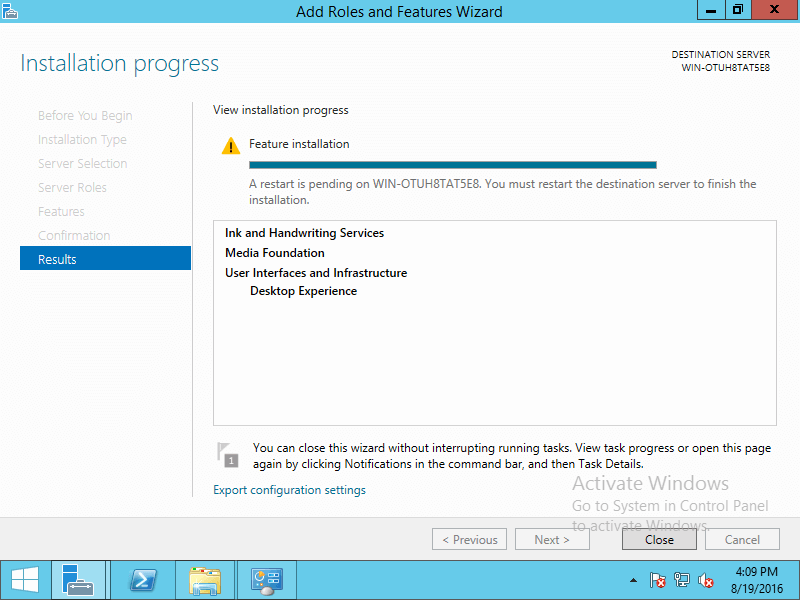
Step 5: Restart the server to finish adding features.
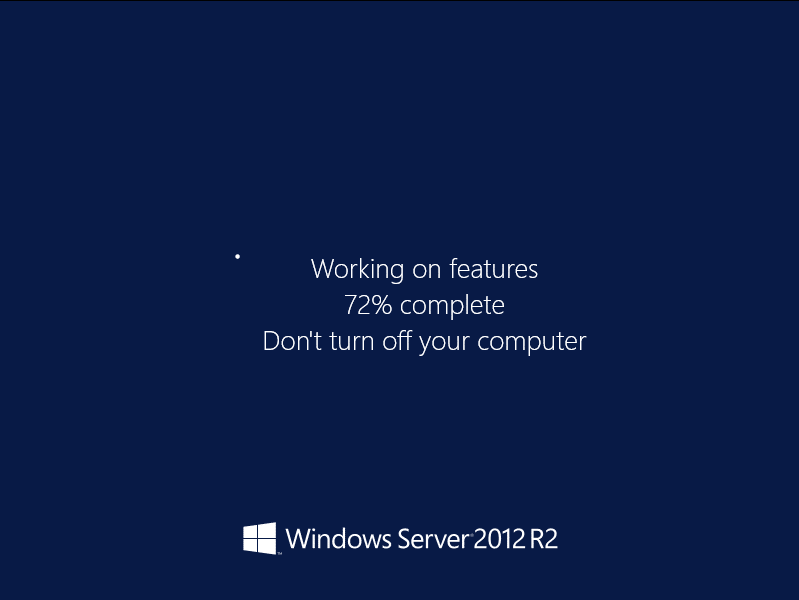
After booting to desktop, when you right click C drive in Explorer, you’ll see Disk Cleanup.
How to run Disk Cleanup in Windows 2012 server
If you installed Disk Cleanup in Windows 2012 server, there are 2 ways to start this uility:
- Press Windows + R keys together, type cleanmgr and press Enter.
- Press Windows + E to open File Explorer, right click C drive and click Disk Cleanup.
If you enable Server 2012 Disk Cleanup by simply copying files, only method 1 is valid.
No matter which method you use, a dialog-box will be pop up, you just need to select the files to remove and confirm the operation.
Important step after cleaning up disk
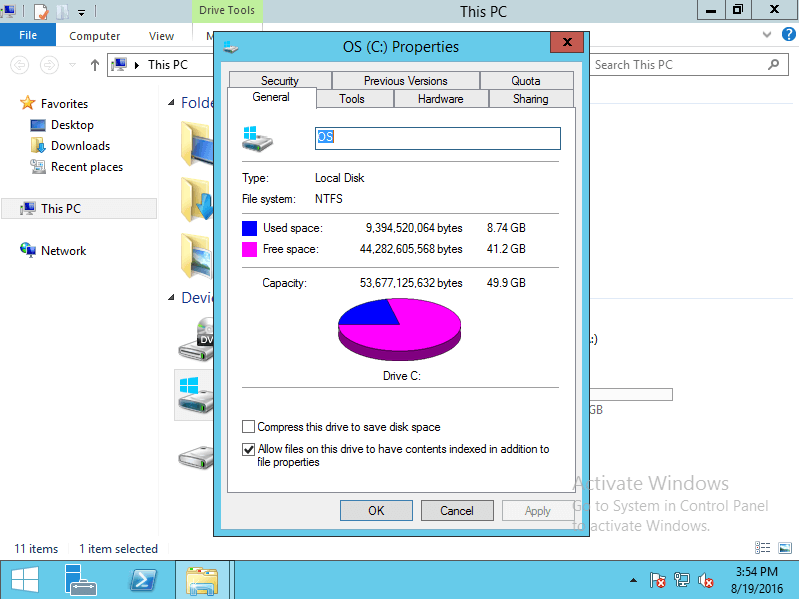
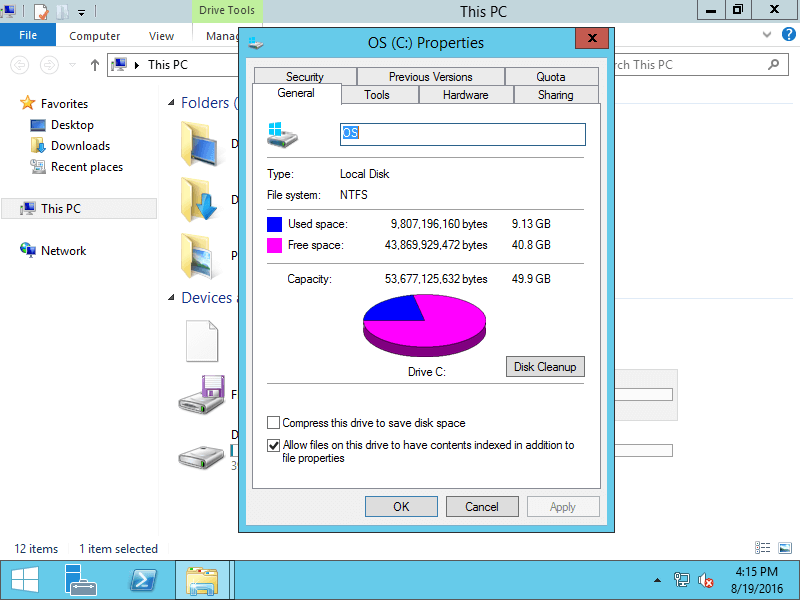
Disk Cleanup is a good tool to help free up disk space, but in most cases you cannot reclaim large amount of free space. Therefore, C drive will become full again shortly. To completely solve this problem, you’d better add more free space to C drive from other partitions.
Step 1: Download NIUBI Partition Editor, right click D: drive (the adjacent volume behind C drive) and select “Resize/Move Volume“.
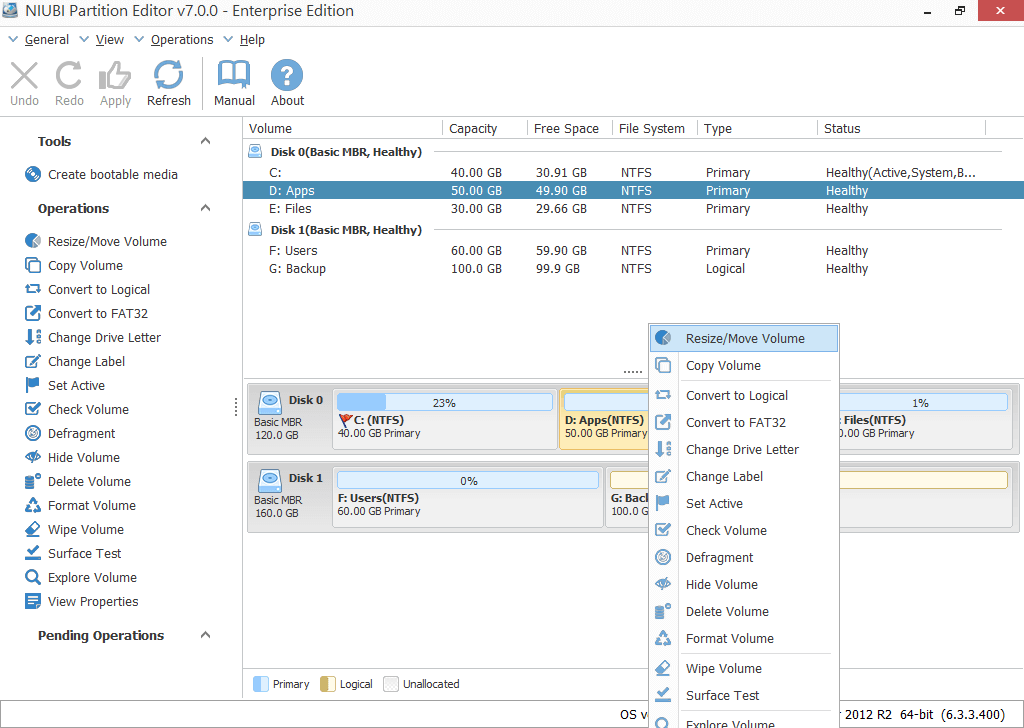
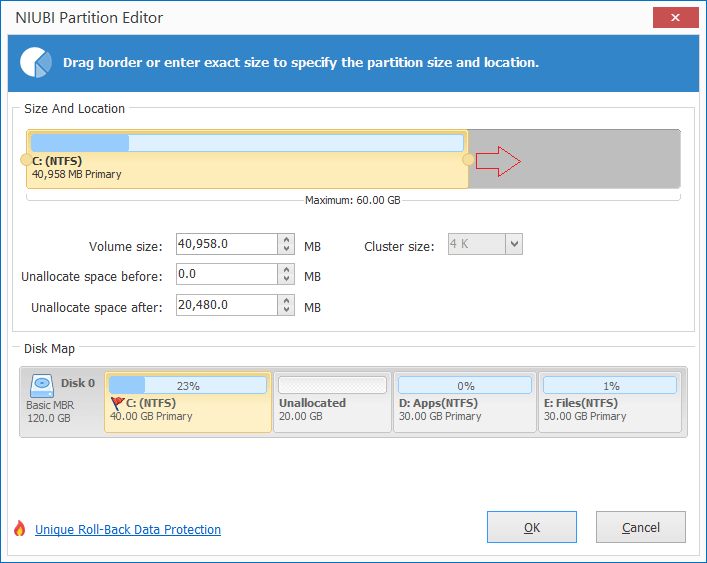
Step 2: In the pop-up window, drag the left border rightwards or enter an amount in the box of “Unallocated space before”.
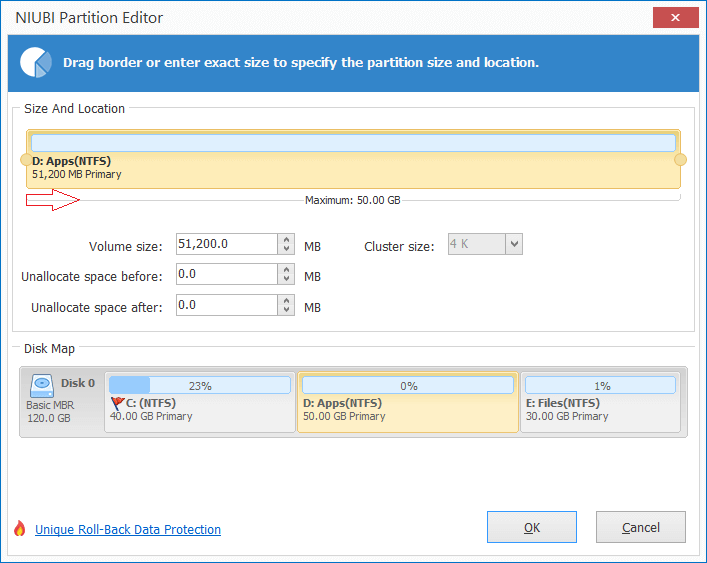
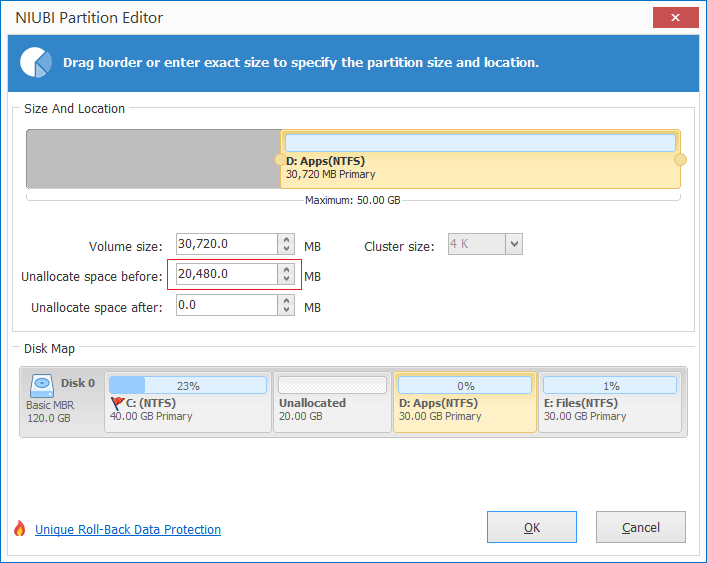
Click OK and back to the main window, D drive is shrunk and Unallocated space is made on the left. A new pending operation is added on bottom left.
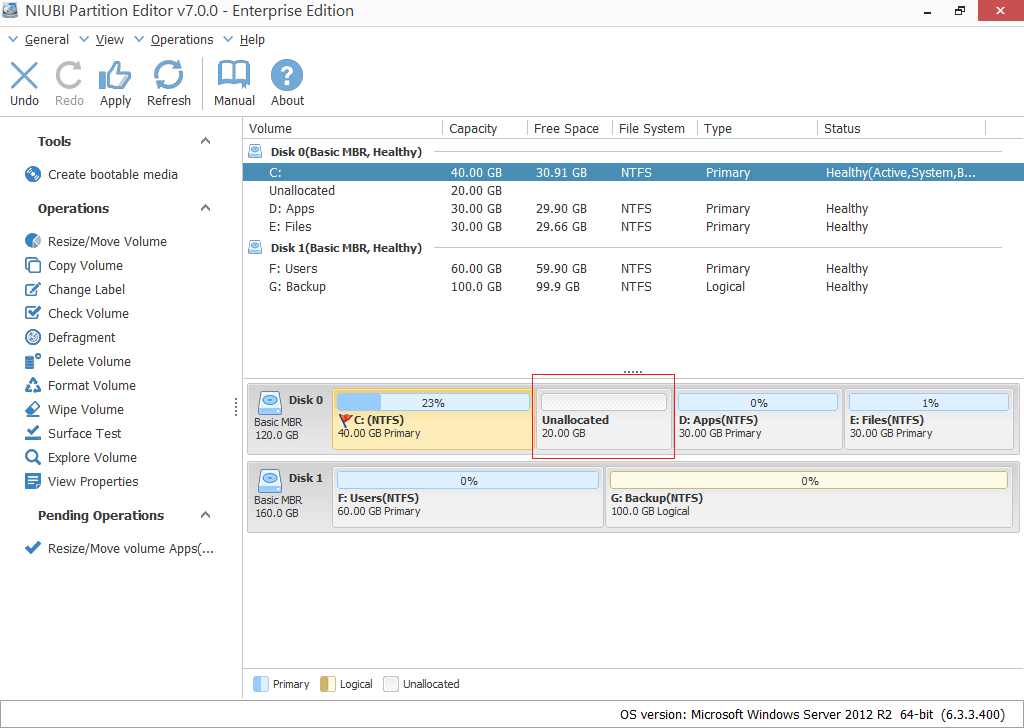
Step 3: Right click C: drive in NIUBI and run “Resize/Move Volume”, drag the right border rightwards to combine this Unallocated space.
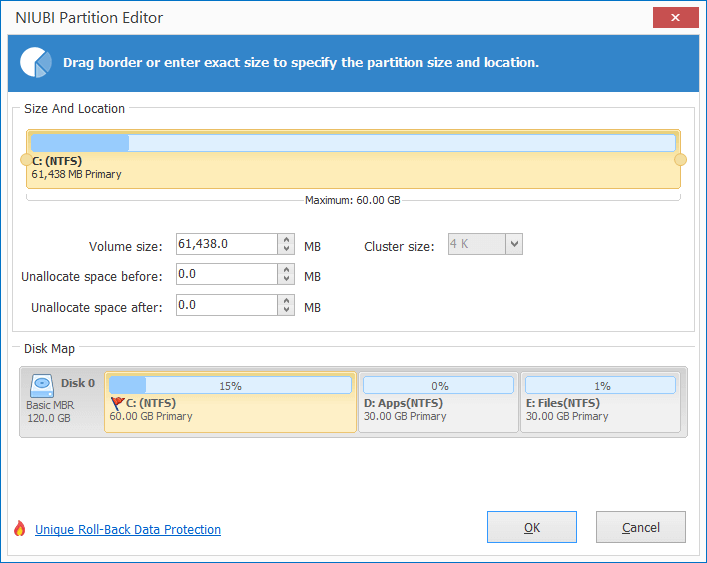
Step 4: The second pending operation is added, click Apply on top left to take effect.
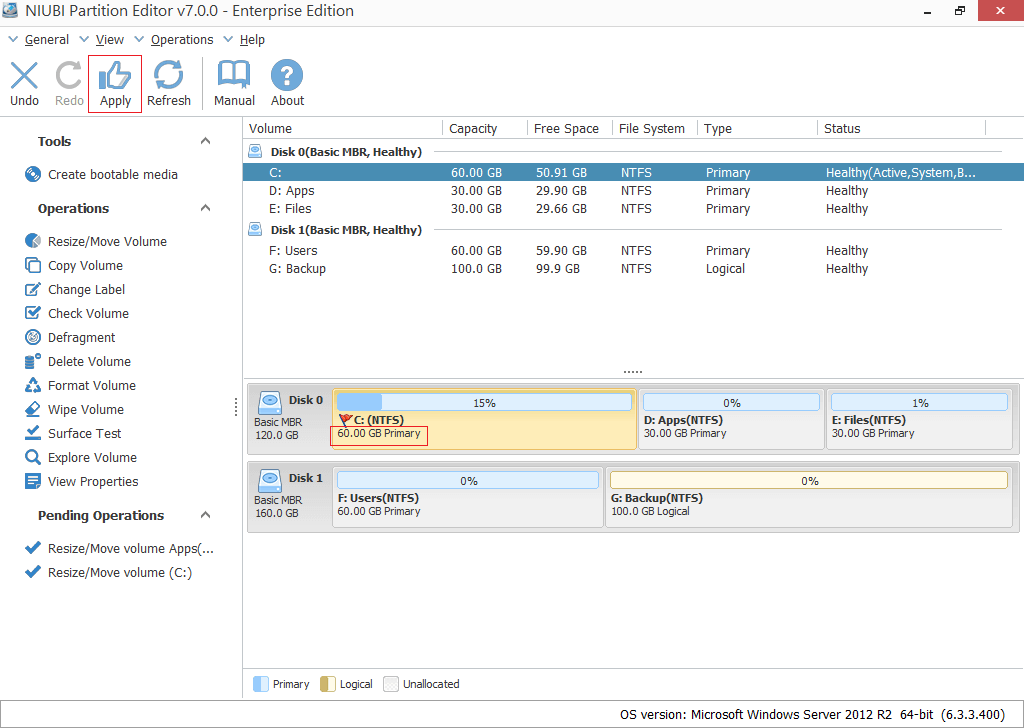
In most cases, there’s plenty of free space in other partitions on the same disk, so you can move free space to C drive. In this way, operating system, programs and anything else (except partition size) keep the same with before. Better than other tools, NIUBI Partition Editor has Virtual Mode, Cancel-at-well, 1-Second Rollback and Hot Clone technologies to protect system and data. Besides shrinking and extending partition without losing data, this tool helps you do many other disk partition management operations.
Tips: you’d better expand C drive as large as possible with NIUBI and run Disk Cleanup in Windows Server 2012 monthly to remove new generated junk files.