How to repartition hard drive in Windows Server 2016?
Windows Server 2025 will be released soon, but many people and organizations still use Server 2016. Because this server has been running for a long time, the existing partition layout is not the best. Many people ask whether it’s possible to repartition hard drive in Windows 2016 server without losing data. The answer is yes and I’ll introduce how to achieve easily and safely.
Some people want to shrink partition to create more, but some people want to extend partition. In this article, I’ll show you detailed steps to repartition Server 2016 disk drive without losing programs or any data.
Repartition hard drive in Disk Management
Besides basic operations to create, delete and format partitions, you can shrink and extend existing drives in Server 2016 Disk Management, however, due to many limitations, it is not the best tool to repartition disk drives. Only when you shrink partition to create more, you may try this native tool. Disk partition software is still required in most cases.
How to shrink volume in Server 2016 without software:
- Right click Windows on bottom left and select Disk Management.
- Move mouse to the disk you want to repartition, right click the drive and select Shrink Volume.
- Enter an amount of space and click Shrink button to proceed.
In a short time, some unallocated space will be created on the right of this partition.
How to extend volume in Server 2016 with Disk Management:
Check if there is adjacent unallocated space on the right of the drive that you want to expand, if there is not, the method below is invalid.
- Open Disk Management.
- Right click the drive and select Extend Volume.
- Extend Volume Wizard will be launched, simply click Next to continue.
- Select the available space to add.
- Confirm this operation and proceed.
The key limitations to repartition hard drive with Disk Management:
- Note NTFS partitions are supported.
- Shrink Volume cannot shrink a partition beyond the point where any unmovable files are located. It can only make unallocated space on the right when shrinking a partition.
- Extend Volume is disabled if there is no adjacent unallocated space on the right.
The task to repartition hard drive in Windows Server 2016 becomes much easier if you use server partition software.
Repartition disk drive with safe partition software
As I said above, the aim to repartition hard disk on Server 2016 is different. In this article I’ll introduces how to shrink a volume to create new drives, and shrink a volume to expand another one.
How to shrink volume to create more
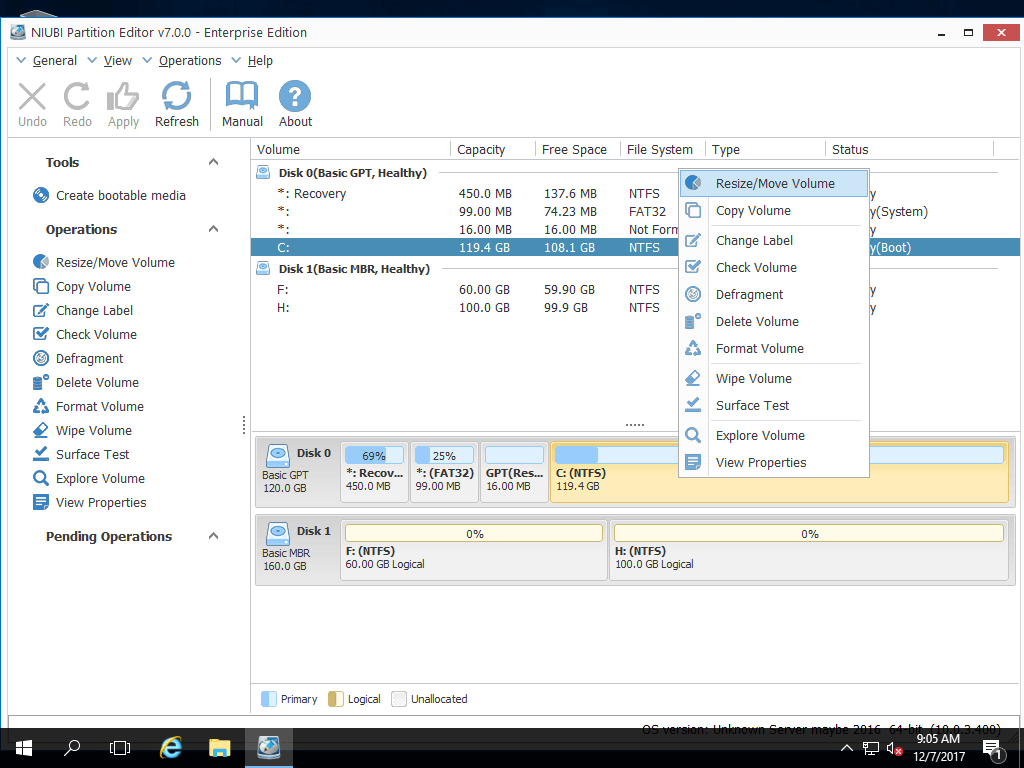
Step 1: Download and install NIUBI Partition Editor, right click C drive and select “Resize/Move Volume“.
Step 2: In the pop-up window, drag right border leftwards to release unallocated space on the right.
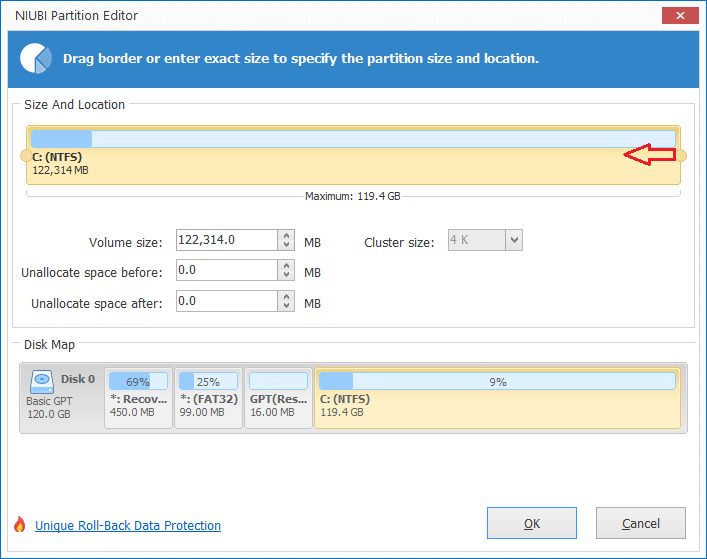
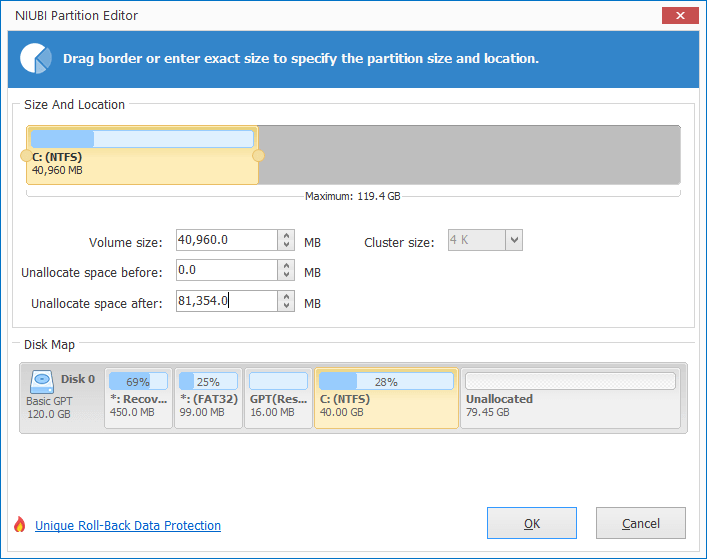
Unallocated space will be created behind C drive. When shrinking a data volume, you can make unallocated space on either left or right.
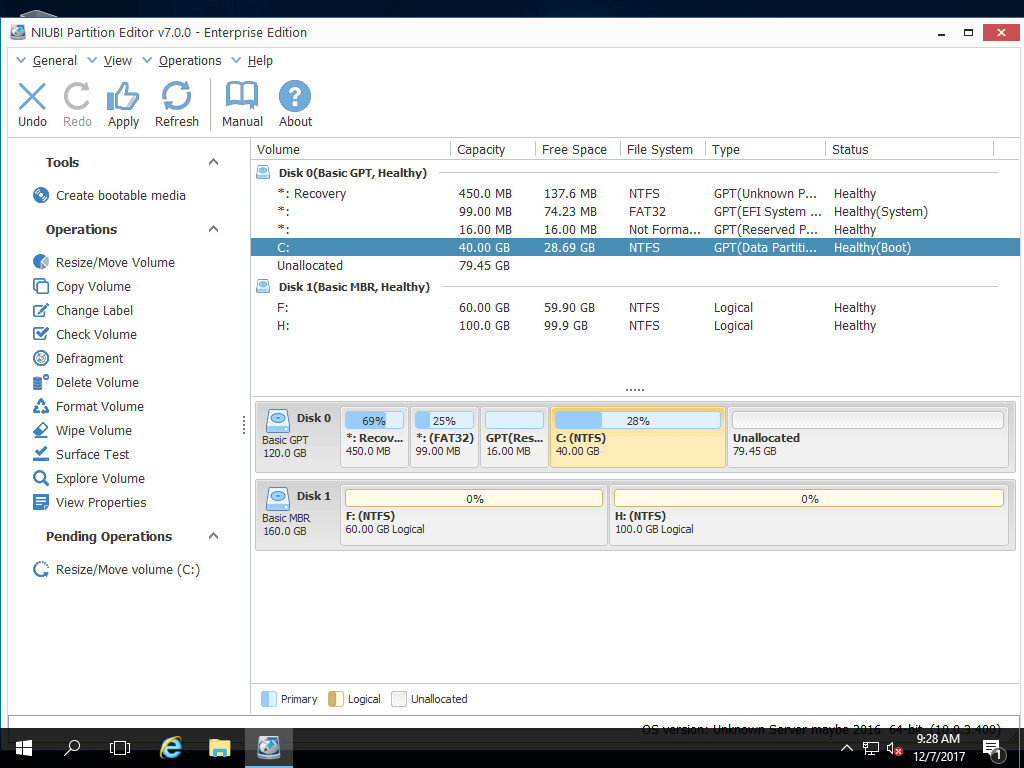
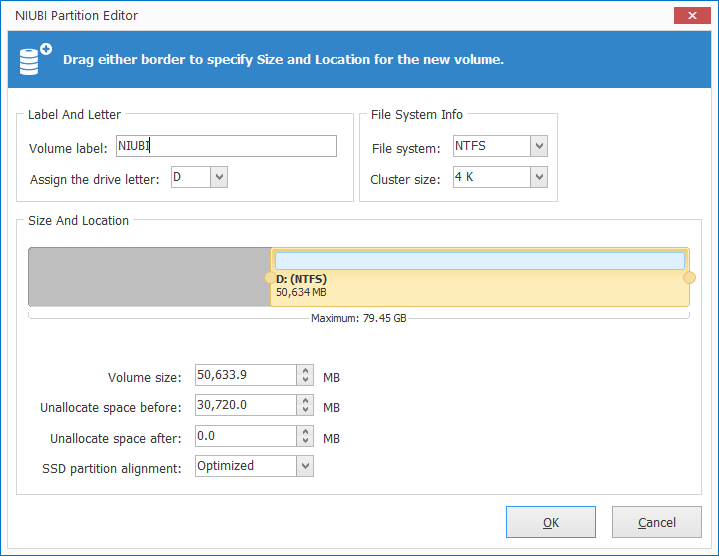
Step 3: Right click this unallocated space and select “Create Volume“. In the pop-up window, you can indicate partition size and other parameters:
- Add label (name) to the new volume.
- Select a drive letter
- Select file system
- Select cluster size
- If the hard disk is MBR, you can select create new volume as logical or primary here.
How to shrink volume to extend another one
Most of people want to shrink the volume that has large amount of free space and extend the volume that is running low, especially shrink D drive to expand C. Follow the steps in this video and you’ll know how easy it is to repartition Server 2016 hard drive.
Besides resizing partition in Windows Server 2016/2019/2022 and old Server 2003/2008/2012, NIUBI Partition Editor helps you do many other disk/partition management operations.