How to repartition hard drive in Windows Server 2012 r2
Original partition layout will not meed your needs after running the server for a period of time. The typical example is that system C drive is getting full. When it happens, there is not enough free space to install Windows updates and applications. It may cost a whole day if you back up everything, recreate partitions, restore from backup and verify data. Obviously, nobody wants to do like this. This is the reason why many people want to reallocate partition size without losing data. In this article, I’ll introduce how to repartition hard drive in Windows Server 2012 R2 step by step.
Which tool to reallocate partition size
To repartition hard drive in Windows Server 2012 r2, you may either use native Disk Management or third party software. The same with previous version, Disk Management in Server 2012 has “Shrink Volume” and “Extend Volume” functions to help reallocate partition size. However, you’ll encounter many problem if you repartition drive with this tool, because it has many shortages. For example:
- It can only repartition NTFS drive, other types of partitions are not supported.
- It can only shrink partition with little space if there are “unmovable” files in this partition.
- It can only shrink a partition towards left side and make unallocated space on the right.
- It can only extend a partition when there’s contiguous unallocated space on the right.
If you just want to shrink a partition to create new volume, you may try Disk Management. If you want to extend a partition, Disk Management cannot achieve by shrinking other volume. To better reallocate partition size in Windows Server 2012 R2, third party software is needed.
Note: both Disk Management and third party program are not 100% safe especially when shrinking partition. You’d better make a backup in advance and run safe partition software.
Better than other tools, NIUBI Partition Editor has 1-Second Rollback technology to protect system and data. If it detects any error while repartition hard drive, it is able to revert server to original status automatically or rapidly. It has Virtual Mode and Cancel-at-well technology to avoid wrong operations. Furthermore, it is able to clone disk partition without server interruption. You may clone disk before any operations or regularly as backup. Then you can boot from or switch to the clone disk immediately if anything goes wrong.
To repartition Server 2012 hard drive, you just need to drag and drop on the disk map. Shrink a partition and make unallocated space on left or right, then you can easily create new volume or merge this space to other partition.
How to repartition hard drive in Windows Server 2012 R2
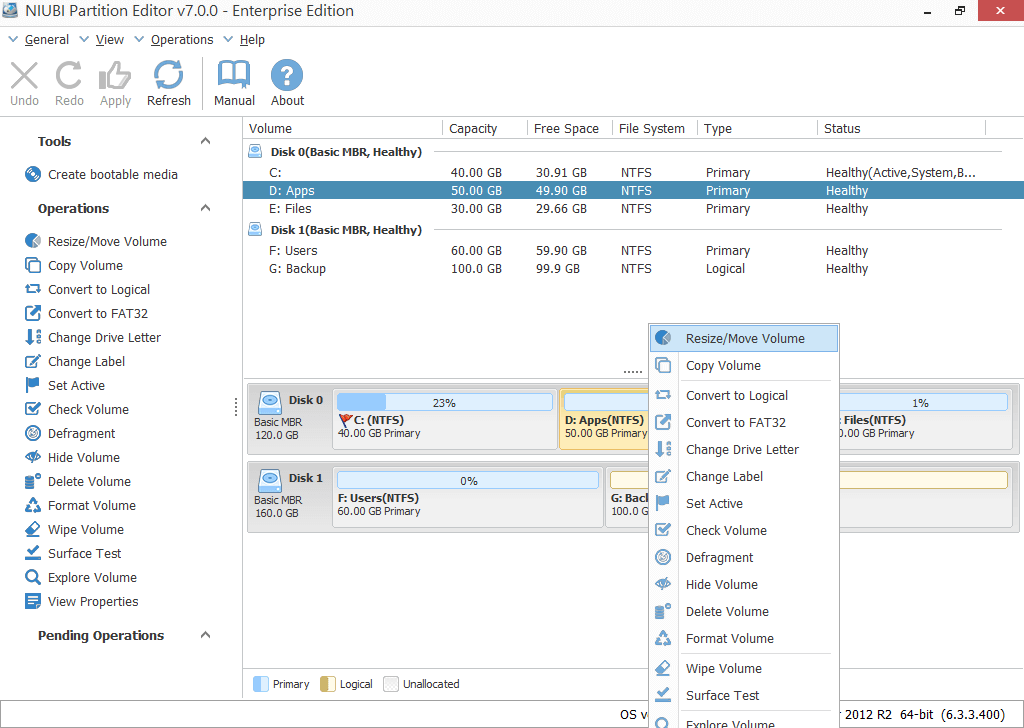
Step 1: Download NIUBI Partition Editor, right click a NTFS or FAT32 partition (here is D:) and select “Resize/Move Volume“.
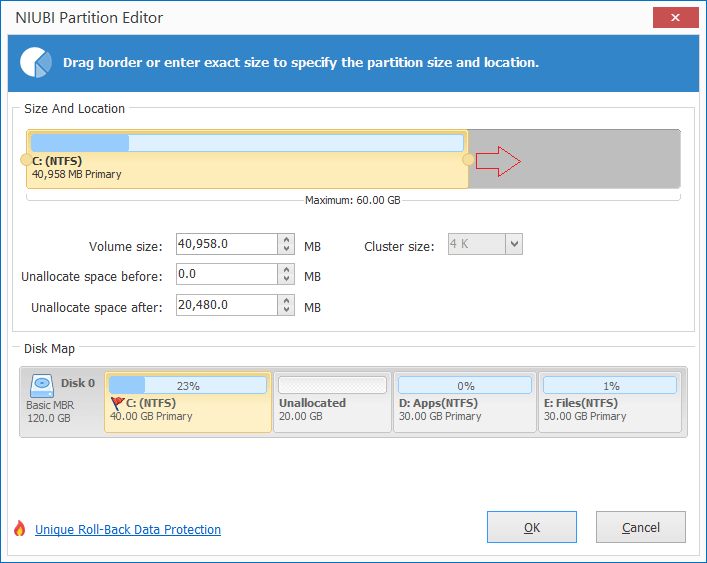
Step 2: In the pop-up window, drag either border of this partition towards the other side, then this partition will be shrunk.
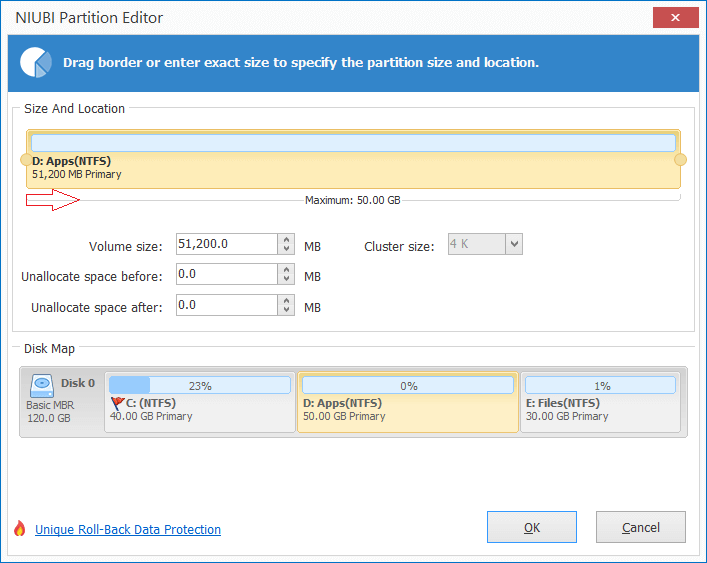
Another option is entering an accurate amount in the box of “Unallocated space before” or “Unallocated space after”.
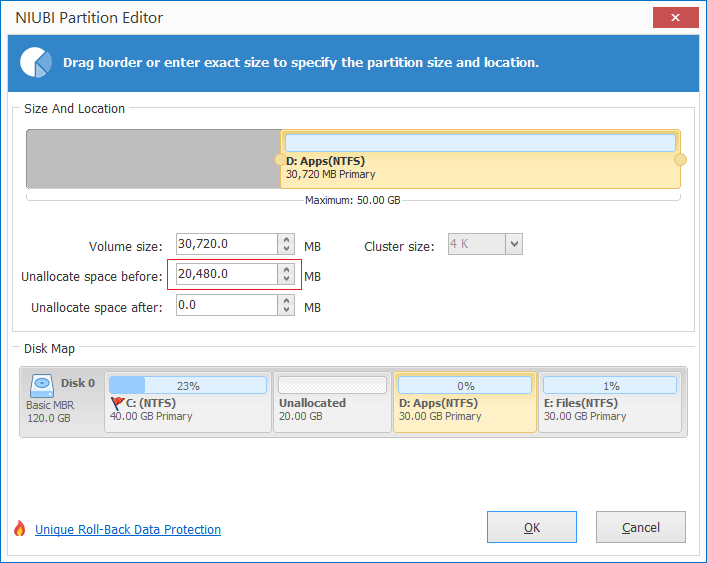
Click OK and back to the main window, unallocated space will be made on the left or right of this partition. If you want to shrink D and extend C drive, make unallocated space on the left when shrinking D drive.
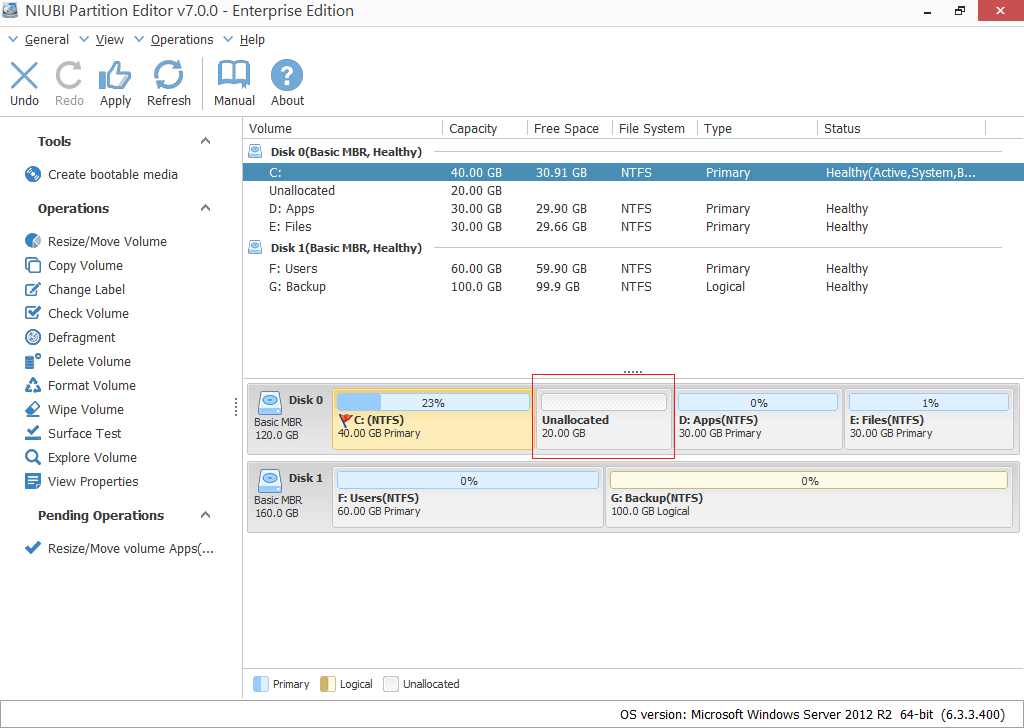
Step 3: Right click C: drive and run “Resize/Move Volume” again, drag the right border rightwards to combine this unallocated space.
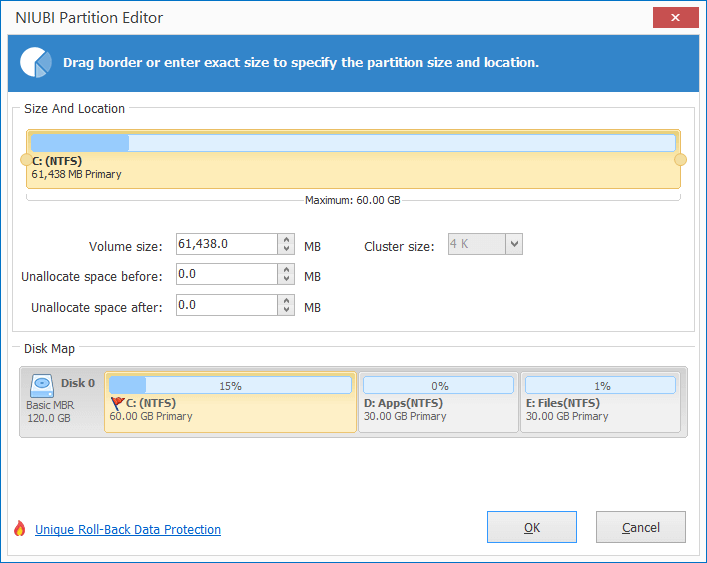
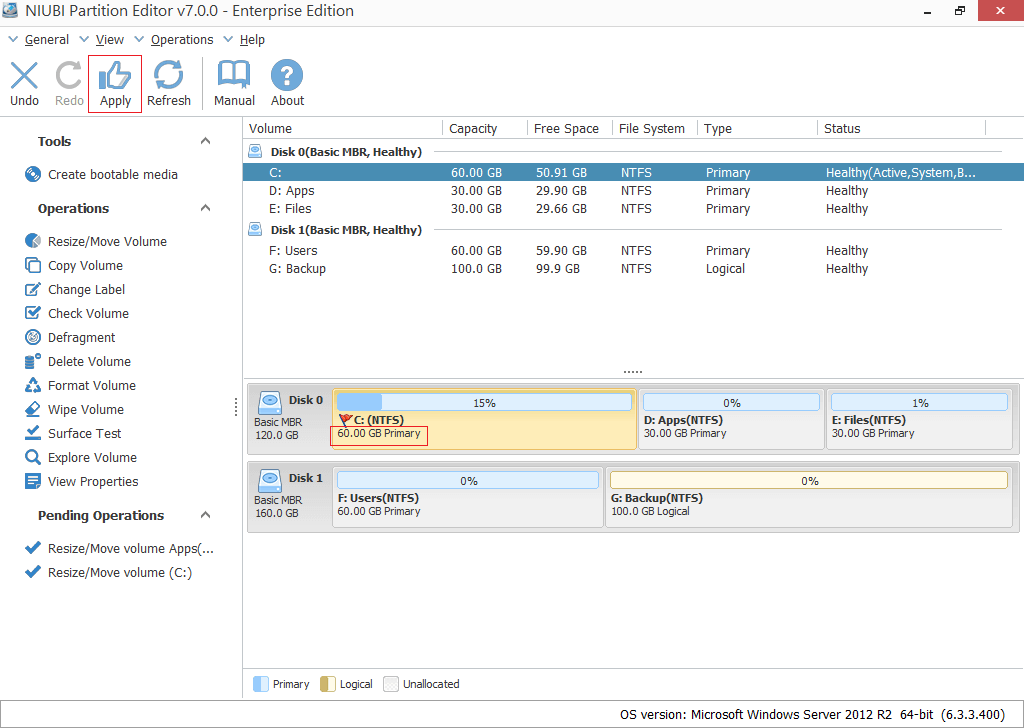
Step 4: Click Apply on top left to execute, done! (Note: all operations before this step only work in virtual mode.)
If there is not plenty of free space in drive D, you can expand C with nonadjacent partition on the same disk.
How to repartition Server 2012 R2 drives:
Besides repartitioning hard drive in Windows Server 2012/2016/2019/2022/2003/2008, NIUBI Partition Editor helps you clone disk/partition, convert disk/partition type, defrag, wipe, hide partition, optimize file system, scan bad sectors and much more.