How to shrink volume in Windows platform?
Many people do not know how to create partitions (also called volume or drive) and fresh install Windows, so they may install Windows to the whole disk, that is to say, only one partition created after installing. Some personal computers created huge data drive from factory settings. We know the best strategy to use a hard disk is dividing into several small volumes – one for Operating System, one for applications, one for data, one for backup, etc. It won’t be a problem if you know how to shrink the large volume. In this article, I’ll give detailed introduction of how to shrink volume in Windows Server 2016/2012/2008/2003 and Windows 10/8/7/Vista/XP.
– Shrink volume via diskpart command
DiskPart is a text-mode command line tool interpreter which enables storage objects such as disks, partitions or volumes configuration and management from a script, remote session, or direct input from a command prompt.
There is no GUI function in Windows Server 2003 and XP Disk Management console, the only Windows built-in utility to shrink partition is Diskpart command.
How to shrink partition with diskpart
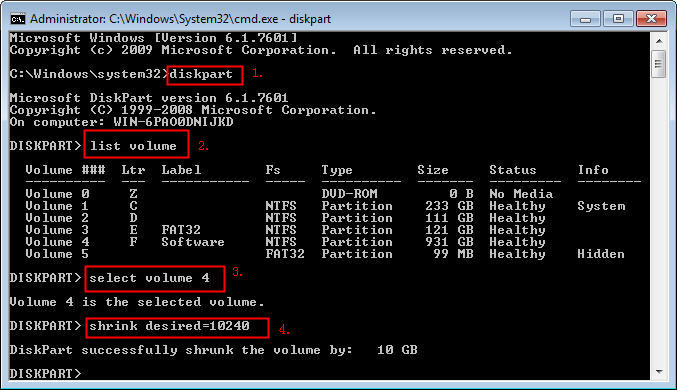
Press Windows and R key on keyboard, type “cmd” and press Enter to open the command line prompt.
- Type “diskpart” and press Enter to run this utility.
- Type list volume.
- Type select volume n (n is the number) to select the volume you want to shrink.
- Type shrink desired=size to shrink the selected volume. (size is in megabytes MB)
Limitations of shrinking volume with diskpart
- The system volume (C drive) cannot be shrank.
- It works by command line and hard to use for many users.
- Incorrect operations cannot be undone.
- Stop the PC or Server running for a long time.
– Shrink volume under Disk Management
In Windows Vista and later versions including Windows 7/8/8.1 and Server 2016/2012/2008 (R2), Microsoft provides GUI Shrink Volume function to reduce partition size, so it is much easier to operate.
How to shrink partition in Disk Management?
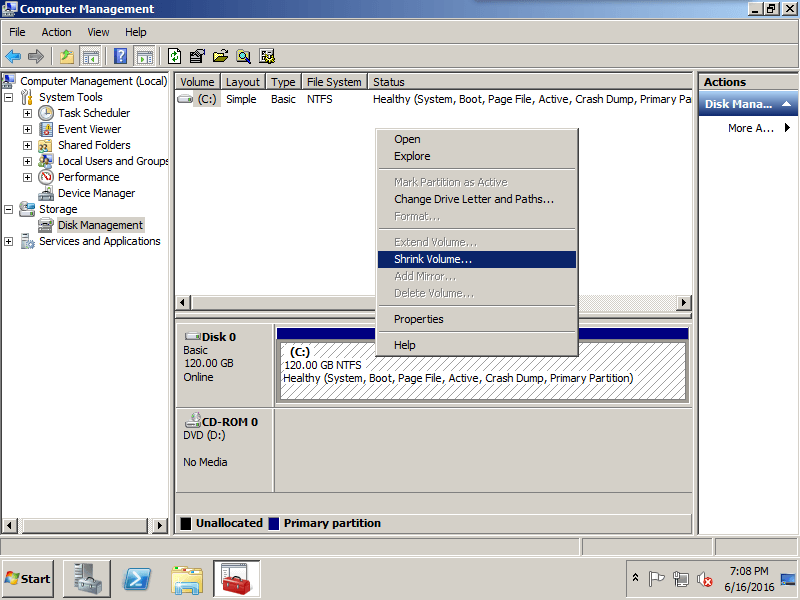
Step 1: Press “Windows” and “R” on keyboard, type “compmgmt.msc” to open Disk Management console. Right click the partition and select “Shrink Volume“.
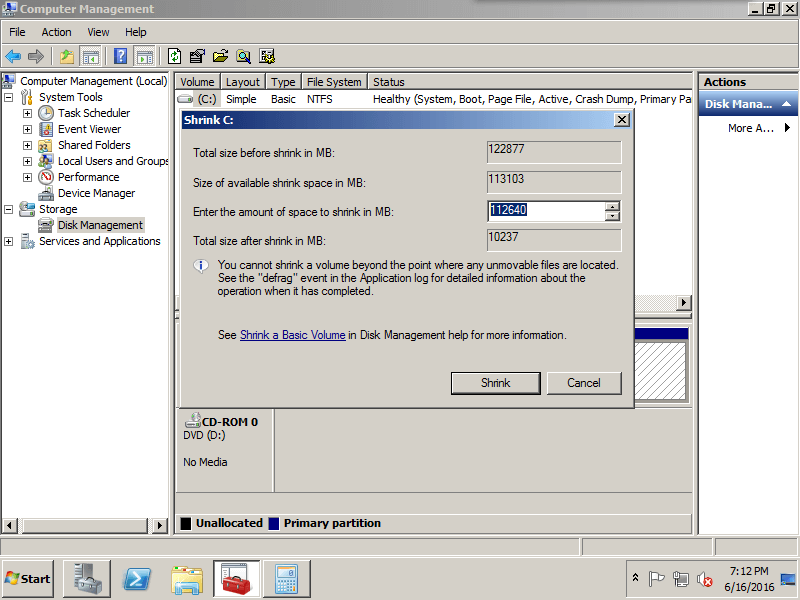
Step 2: In the pop-up window, type the value how much free space to shrink from the C drive. (or any drive you want to shrink)
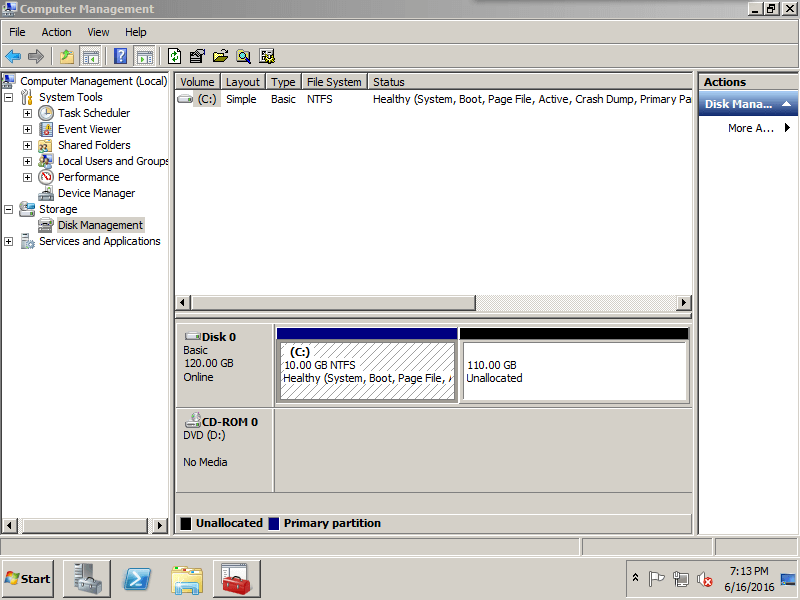
Step 3: Click “Shrink“, original 120GB C drive shrank to 10GB.
Limitations of shrinking volume in DM
- When you shrink a partition, unmovable files (for example, the paging file or the shadow copy storage area) are not automatically relocated and you cannot decrease the allocated space beyond the point where the unmovable files are located. This is the reason why you cannot shrink large amount of free space.
- When you shrink a partition, the Unallocated space can only be created behind it.
- The Unallocated space shrank from a partition can only be used to create new partitions, it cannot be used to extend another one.
– Shrink volume with 3rd party software
Comparing with Windows built-in diskpart command or Disk Management, 3rd party software is much powerful.