How to increase partition size in Windows Server 2012 r2
Originally, when C: drive is getting full, you have to back up everything, delete and recreate partitions, finally restore from backup. If you ask help from server seller, you’ll get reply of similar solution. How time consuming it is. Obviously, nobody wants to do like this. This is the reason why many people ask if it’s possible to increase C drive space for Windows 2012 server without losing programs and data. The answer is yes. You may try Windows native Disk Management or third party partition software. In this article, I’ll introduce how to increase partition size in Windows Server 2012 R2 with both tools.
Option 1 – increase partition size with Disk Management
The same with other versions, Windows Server 2012 has “Extend Volume” function in Disk Management. However, it can only increase NTFS partition. FAT32 and other types of partitions are not supported. In addition, your disk partition layout must meet the requirements below.
Requirements to increase partition size in Server 2012 via Disk Management:
- The partition to be extended must be formatted with NTFS file system.
- There’s another partition on the right and you must delete it to get adjacent unallocated space.
- The partitions to be deleted and extended must be the same primary or logical.
Besides “Extend Volume”, there’s “Shrink Volume” function in Disk Management. Some people may ask why not shrinking partition to get unallocated space. Because Disk Management cannot extend this space to other partitions. For example, after shrinking D drive with “Shrink Volume” in Disk Management, unallocated space will be made on the right of D. This space is non adjacent to C drive and is on the left of E drive. Therefore, “Extend Volume” option is disabled.
If your disk partition layout meets the requirements above, you can extend Server 2012 partition without any software, follow the steps below.
How to increase partition size in Windows Server 2012 R2 without software:
- Press Windows + X keys together and click Disk Management in the list.
- Right click the right partition such as D: and select “Delete Volume”.
- Right click the left partition such as C: and select “Extend Volume”.
- Click Next till Finish in pop-up windows.
Note: do not delete partition if there are programs or any Windows services in it. The type of these 2 partitions must be the same. Otherwise, Extend Volume is still grayed out even after deleting.
Option 2 – increase volume size with safe partition software
If you don’t want to delete any partition or the partition layout doesn’t meet the requirements, you have to run third party program. In fact, server partition software is much more powerful and easier to use. However, you’d better make backup first and run safe software. Unreliable tool could damage your system and partitions.
Better than Disk Management and other partition software, NIUBI Partition Editor has Virtual Mode and Cancel-at-will technology to avoid wrong operations. 1-Second Rollback technology to protect system and data. If it detects any error while resizing disk partitions, it automatically reverts server to original status if a flash. It has Clone Clone ability, so you can clone disk partition before any operations or regularly. If anything goes wrong, you can switch to the clone disk immediately.
Another major benefit is speed. NIUBI is much faster because of its advanced file-moving algorithm. This is very helpful to save time if there are large amount of files in your server. To decrease and increase partition size in Server 2012/2016/2019/2022, you just need to drag and drop on the disk map.
How to increase partition size in Windows Server 2012 r2 without losing data:
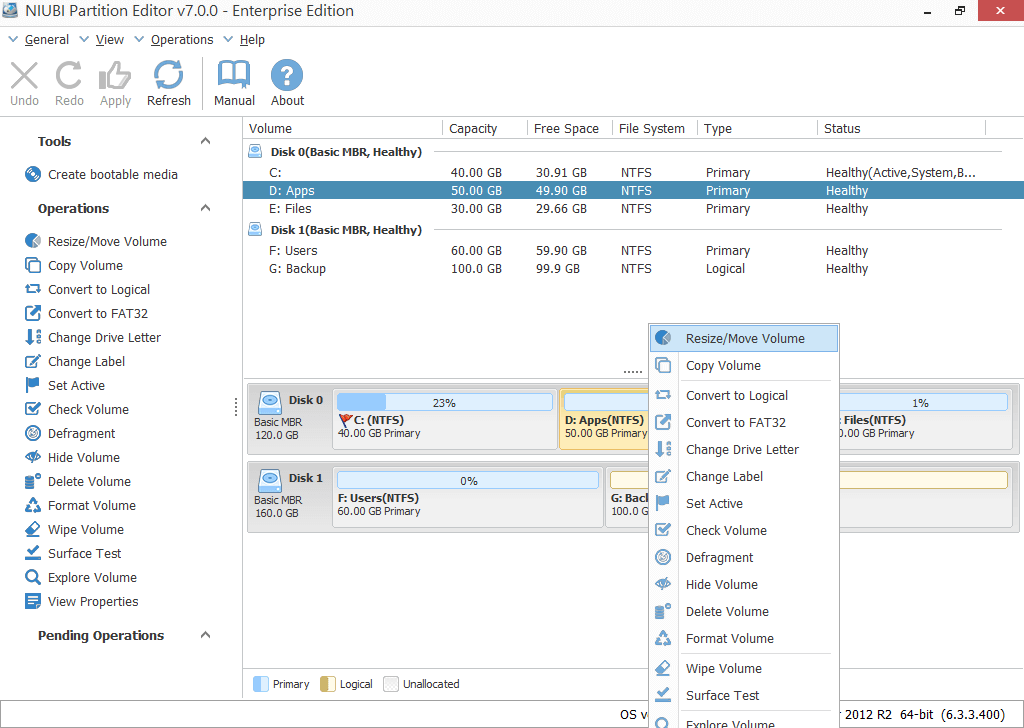
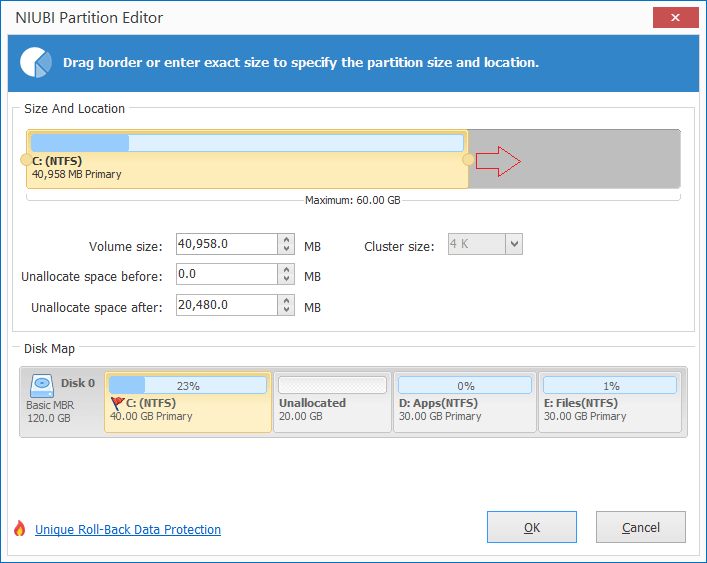
Step 1: Download NIUBI Partition Editor, right click the adjacent partition on the right (here is D:) and select “Resize/Move Volume“.
Step 2: In the pop-up window, drag the left border rightwards to shrink this partition.
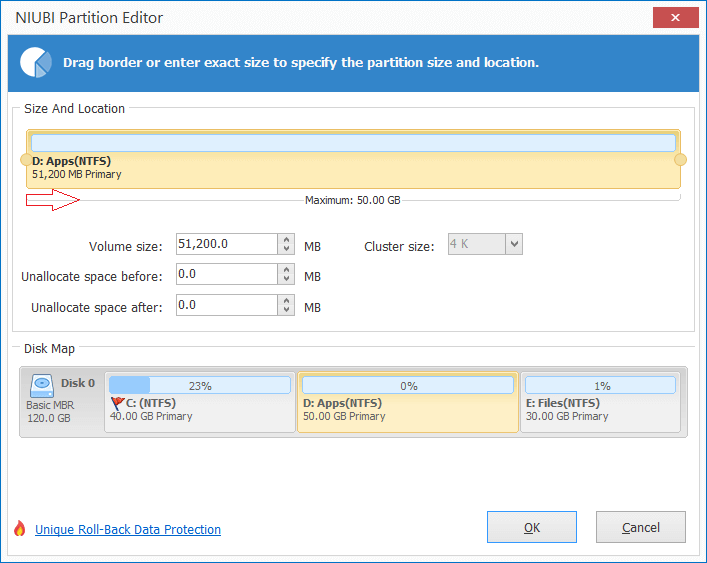
Or input a value in the box of “Unallocated space before”.
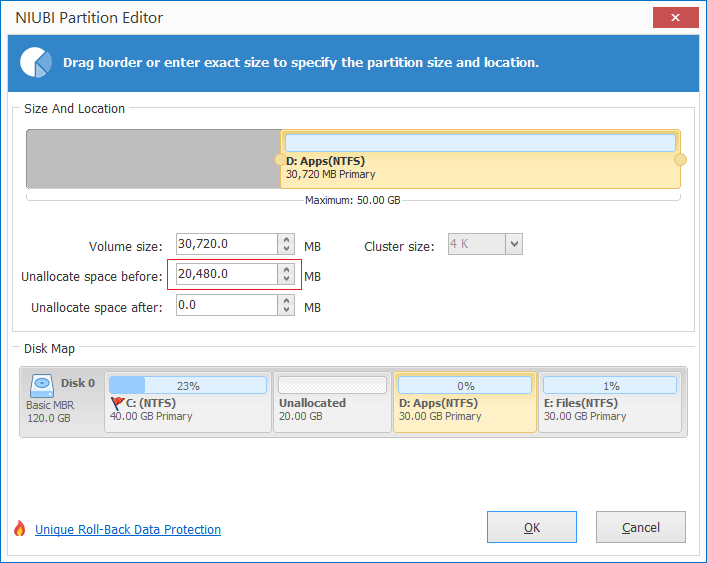
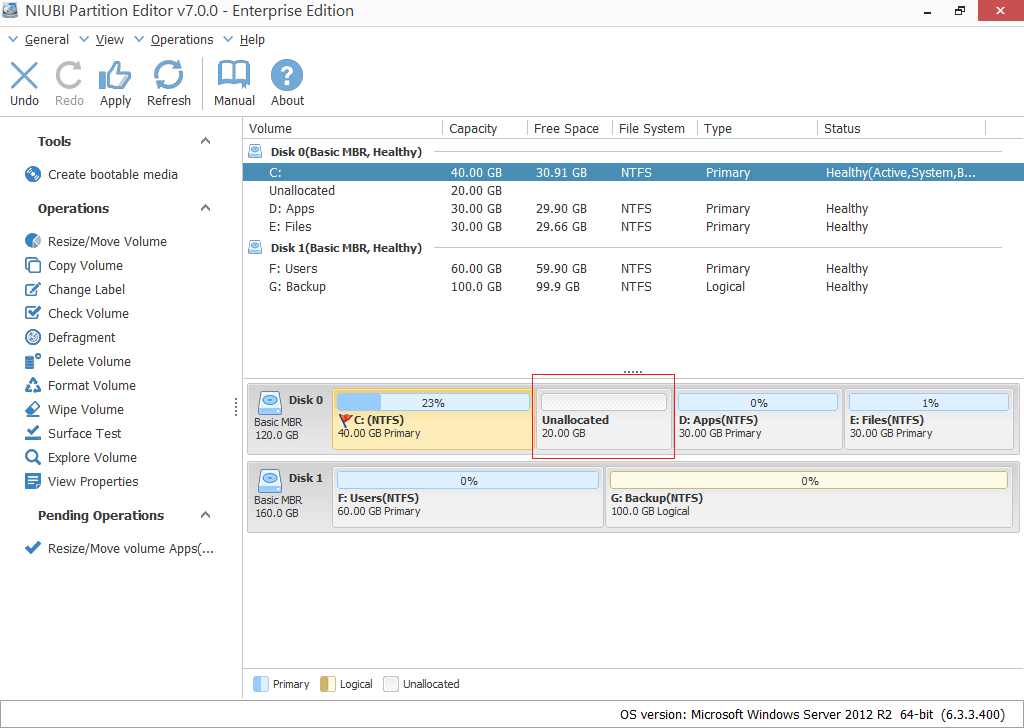
Click OK and back to the main window. Unallocated space is made on the left of D drive and there’s a pending operation listed on bottom left.
Step 3: Right click the contiguous partition on the left (here is C:), drag the right border rightwards to combine this Unallocated space.
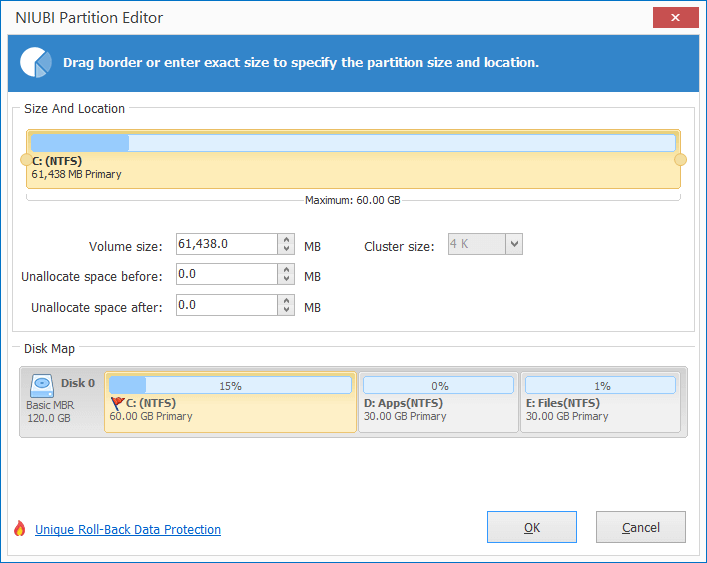
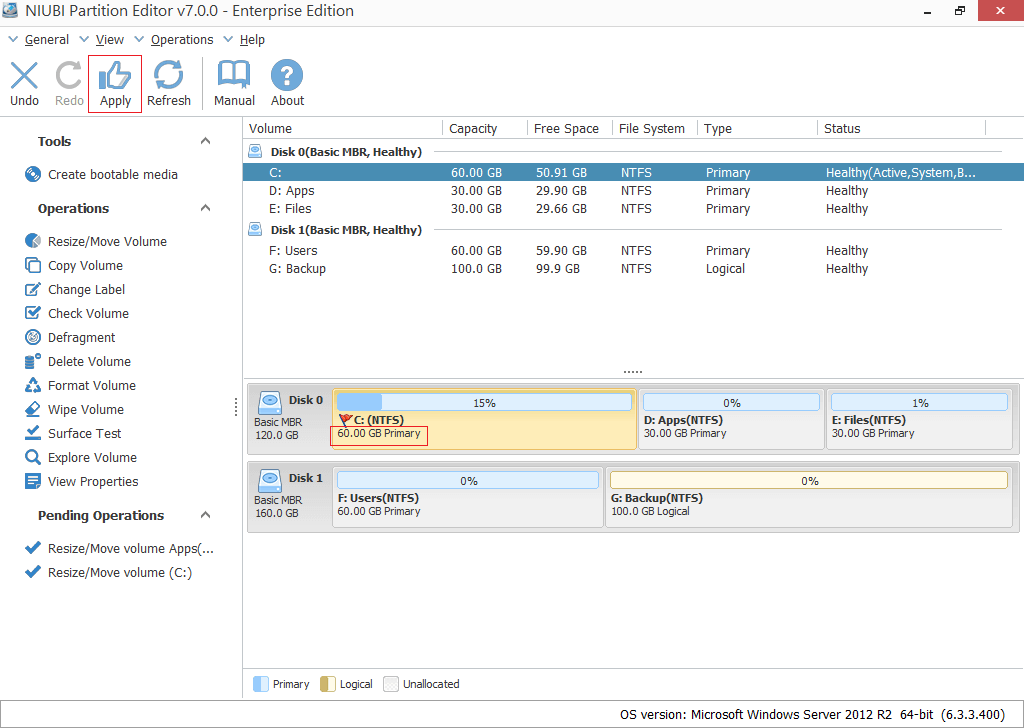
Step 4: Click OK and back to the main window. D: drive is shrunk and C: drive is extended in virtual mode. Click Apply to confirm and begin to resize real partitions.
If you want to extend non adjacent partition such as shrink E to extend C drive for you server, there’s an additional step to move middle partition D to the right. Unallocated space will be moved to the left at the same time.
Video guide to change partition size on Server 2012:
If you use any types of hardware RAID array such as RAID 1/5/6/10, do not break RAID array or do any operation to RAID controller. Follow the same steps above. Besides decrease and increase partition size in Windows Server 2012/2016/2019/2022 and previous Server 2003/2008 R2, NIUBI Partition Editor helps you do many other disk/partition management operations.