Resize C drive in Windows Server 2016 without data loss
Resize C drive means change the partition size of C: drive, either increase or reduce its partition size. In most cases, server administrators want to extend C drive. The typical disk space issue in Windows Server 2016 is C drive getting full and not enough free space left. By resizing partitions, you can shrink data drive to get free space and add to C drive. In this article I’ll show you the easiest way to resize C drive in Windows Server 2016.
Forget Disk Management
From Windows Server 2008, Microsoft added Shrink and Extend Volume function in Disk Management. In Windows Server 2016 you can resize C drive with these functions, too. However, the only available option is Shrink Volume when right click C drive in Disk Management console. That is to say, you can only reduce C drive partition size. If you want to shrink a data drive to get Unallocated space and then extend C drive with Extend Volume function, impossible.
So the best choice to resize C drive is using professional partition software.
Pay attention to server safety
To a server, system and data safety is most important. Different with the read-only program, partition software will move files and modify the parameters of partitions and all files. A bad partition software is very likely to cause system failure, partition corruption or data loss. If it happens, users cannot connect to this server, and it costs a long time to bring back the server online.
NIUBI Partition Editor integrated unique Roll-Back Protection technology, which is able to roll back the server to the status before resizing partition. It is the ONLY software than can ensure 100% data safety, even if power failure or other hardware issue occurred during resizing partitions. Because of its unique file-moving algorithm, this software is 30% – 300% faster than any other tools. It saves much time especially when there are large amount of files in the partition that you want to resize.
How to resize C drive in Windows Server 2016?
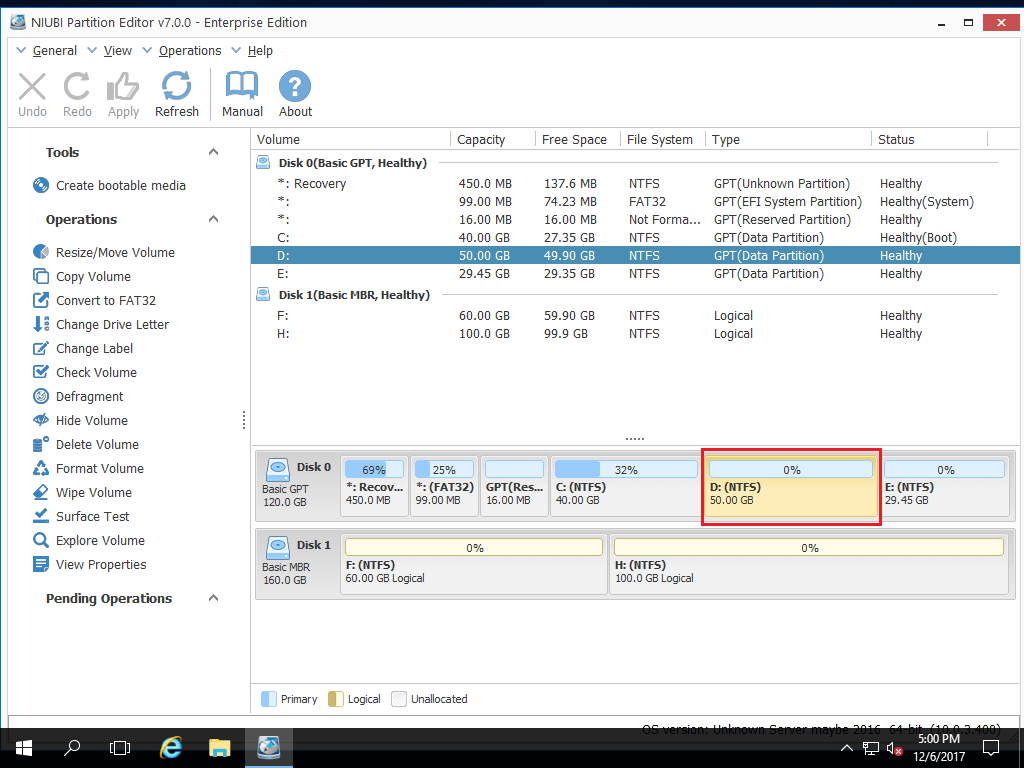
If there is Unallocated space or free space in any other volume of the same disk, you can easily transfer these space into C drive. The most common situation in a server is that C drive becomes full but there is plenty of free space in volume D. So here I give detailed steps how to shrink D to expand C.
Shrink D to get free space:
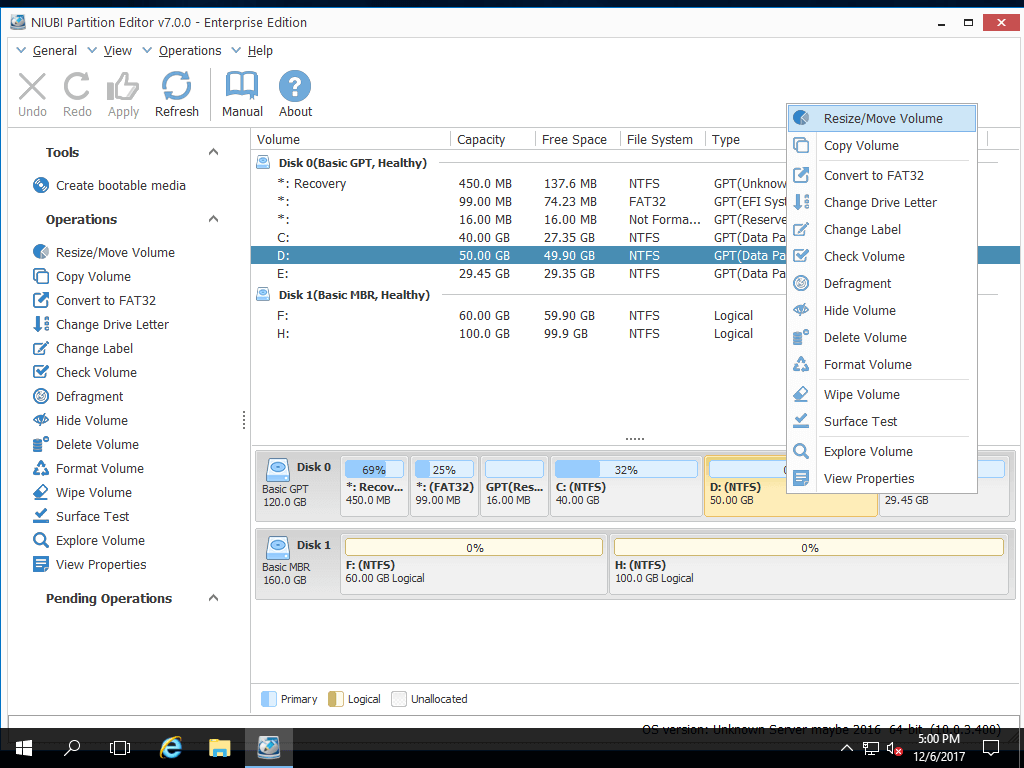
Step 1. Download and install NIUBI Partition Editor, right click volume D and select “Resize/Move Volume“.
Step 2: In the pop-up window, drag left border rightwards to take free space out from D. (If you drag right border leftwards, the Unallocated space will be created at right side of D.)
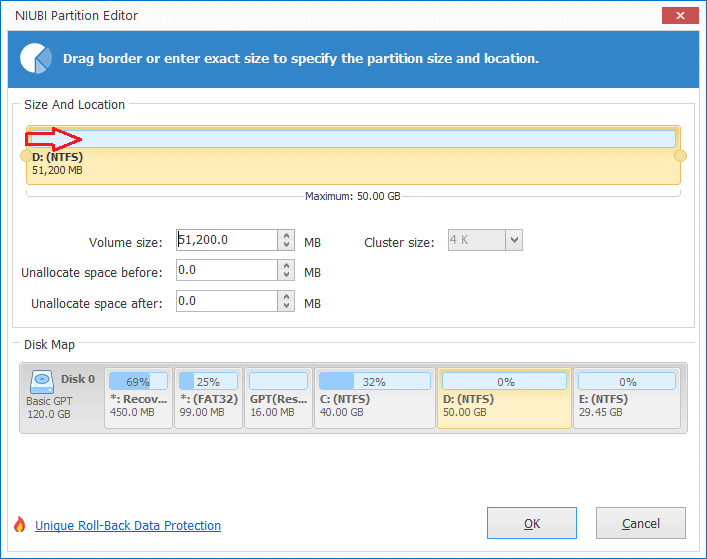


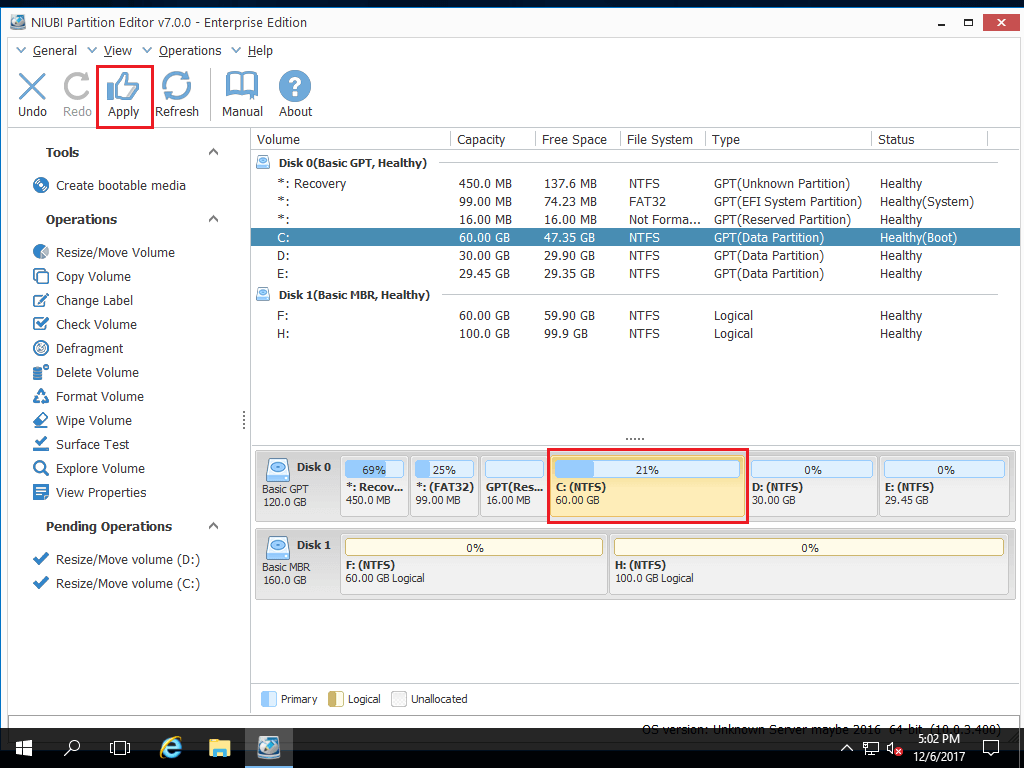
Click OK and back to the main window, 20GB Unallocated space created behind C: drive.

Expand C: drive by holding Unallocated space
Step 3: Right click C drive and select “Resize/Move Volume” again. In the pop-up window, drag the right border rightwards to hold the Unallocated space.
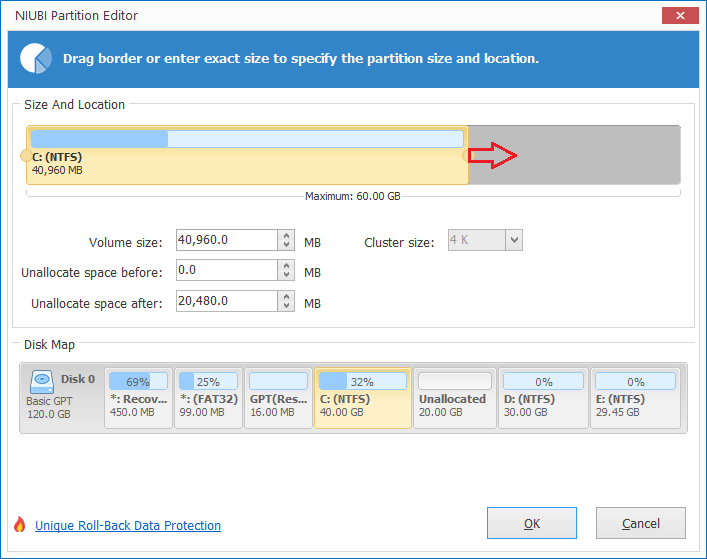

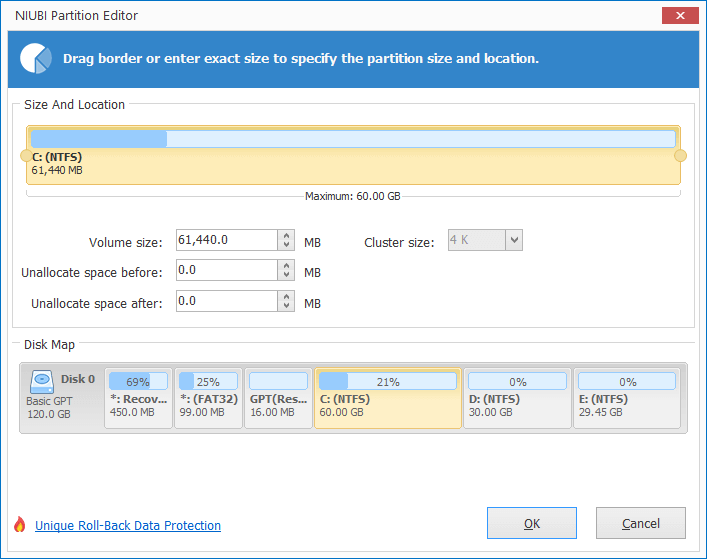
Step 4: Click OK and back to the main window, C drive resized to 60GB by adding the Unallocated space. Click Apply on top left to execute, done.
If there is not enough free space in volume D, you can get free space from other volumes in the same disk. If there is existing Unallocated space, you can add into C drive within few steps, too, check the video.
Resize C drive in Windows Server 2016 (Video)
(Recommend full screen by clicking the square at bottom right of this video)
If you use VMware/Hyper-V, or any type of hardware RAID array, such as RAID 0, 1, 5, 10, the steps are the same with resizing physical disk partitions. Note: do not break RAID array or do any other operations in the RAID controller. Simply run NIUBI Partition Editor to resize C drive on Server 2016.