How to resize partition in Windows without data loss?
Resize partition means change size of existing disk drives, it is useful when a drive running out of free space, you can resize 2 drives to make one smaller and the other one larger. By resizing partitions, you can also reduce a drive and create new with unused space in it. Actually, with partition resizing software, you can change partition size as you wish, easily split a drive to smaller ones, merge drives into larger one, shrink and extend system or data drives. Today I’ll show you how to resize partition in Windows platform without data loss, including Windows 10/8/7/Vista/XP and Server 2016/2012/2008/2003 as well as Small Business Servers.
Why disk partition can be resized
A partition (also called a drive or volume) is a block of entire hard disk. A partition includes some parameters, such as:
- file system of this drive
- total size
- start and end location
- used area and unused area
Windows Operating System can easily locate a file though these parameters, meanwhile, it is able to modify this file and update related parameter. When resizing partition, you can reduce total size of a drive by:
- modify its start or/and end location
- move all files of this partition to new area
- update all related parameters in the file system
Meanwhile, the partition resizing software can expand another drive by holding the unused area of this drive.
The theory is easy to understand, but not every software can complete the partition resizing task well. Two points are very important to a well designed software:
- When resizing a partition whose start location should be changed, all files in this partition should be moved to new area, so it’ll cost a long time especially when there are large amount of files in this partition. The software with good algorithm resize partition much faster.
- You can imagine what will occur if some issue such as hardware failure or power outage appear while resizing partitions. Some files has been moved to new area, but the parameters have not been updated in file system, so these issue will cause data loss or partition corruption. Well designed software should integrates data protection technology.
Steps to resize partition:
In Windows Vista and later editions, Microsoft add new Shrink Volume and Extend Volume function in Disk Management snap-in, so some people try to resize partition with these feature. However, extend volume is greyed out when you try to extend C: drive after shrinking D. Luckily, you can add the Unallocated space that is shrank from drive D: to any other drive with Partition Magic Server, steps:
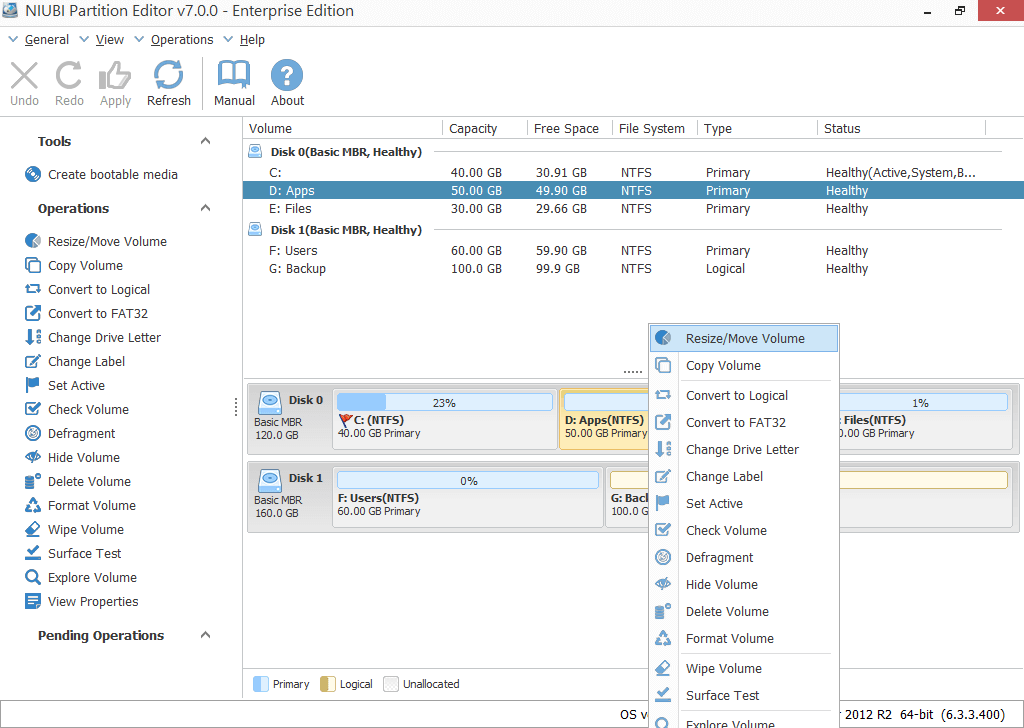
Step 1: Download NIUBI Partition Editor, right click D: drive and select “Resize/Move Volume“.
Step 2: In the pop-up window, drag the left border rightwards to generate free Unallocated space.

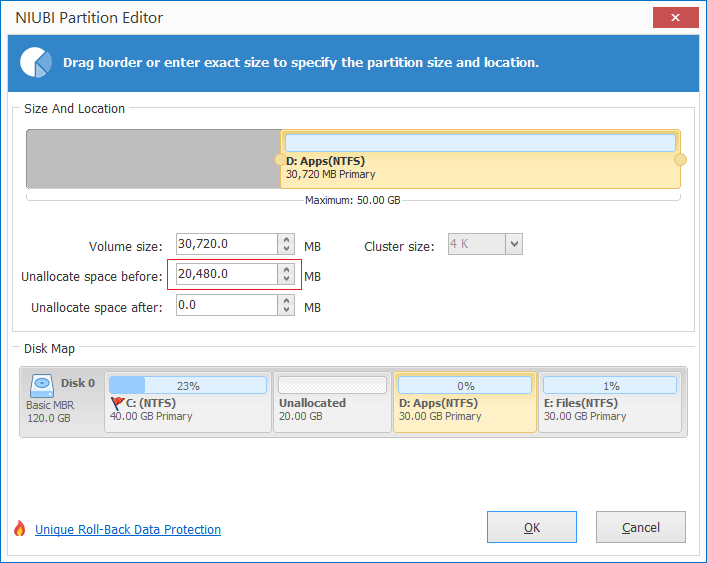
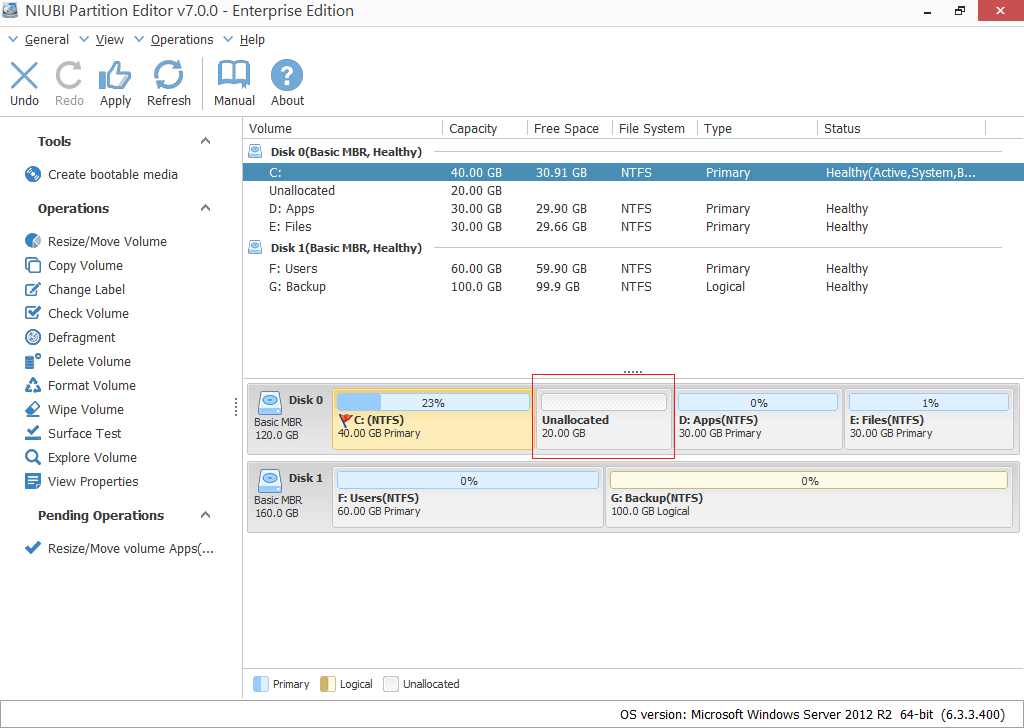
Click OK and back to the main window, where 20GB Unallocated space created behind C: drive.
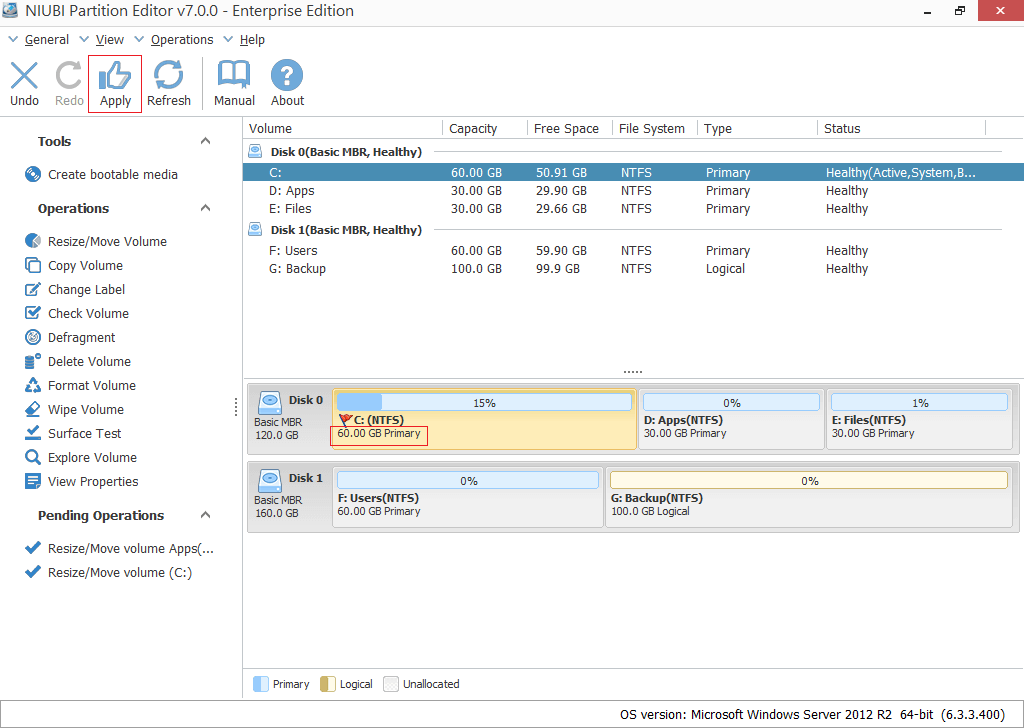
Step 3: Right click C drive and select “Resize/Move Volume” again, in the pop-up window, drag the right border rightwards to hold the Unallocated space.

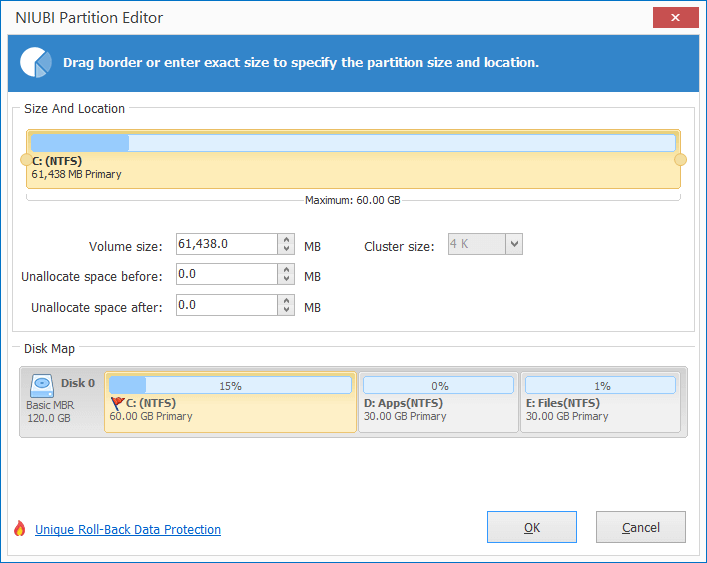
Click OK and back to the main window, where C drive extended to 60GB by holding the 20GB free space from D. Press Apply on top left to execute, done!